INT004 - Department Inquiry Bindings
In this step, you will use the XML Binding Wizard to create the inbound request binding iiiPRO04_request.jar file. This jar file will bind the inbound XML for the server function to receive. You will define the mappings from the XML to your local LANSA fields.
1. From the Project / Solutions node select the New Solution menu item.
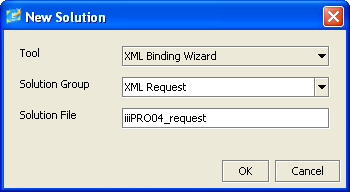
2. A New Solution dialog will appear.
a. Select the XML Binding Wizard in the Tool dropdown.
b. Type or select XML Request in the Solution Group dropdown.
c. Type iiiPRO04_request in the Solution File input field. Click OK.
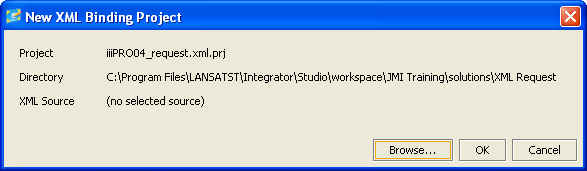
3. A new XML Project panel appears. To select the source XML file, click on the Browse button.
4. A File Open dialog will be displayed.
a. Click on the iiiPRO04_request.xml file to select it.
b. Click on the Open button.
c. In the New XML Binding Project dialog, click on the OK button.
5. The XML Binding Wizard main window will now appear.
a. Select the Configuration tab. This defines where the java classes necessary for binding will be packaged up into jar files. Change the package name to com.iiicompany.service.xml
b. You will be creating a Server to handle the inbound XML request, so click on the inbound checkbox. Notice a new Inbound tab appears.

c. Select the Source tab. You will see the XML source file added to the project.
d. Select the Inbound tab. This is where you will map your fields.
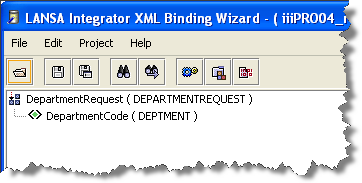
6. Map the XML tag DepartmentCode to the LANSA field DEPTMENT as follows:
a. Select the Inbound tab.
b. Right click on the DepartmentRequest root tag and select Fragment option from the pop-up menu.
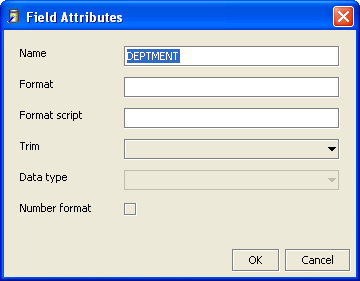
c. Right click on Department Code tag and select Edit from the pop-up menu (or double click on it).
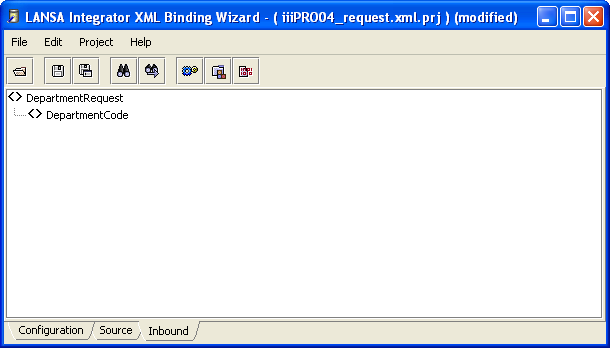
d. In the Field Attributes dialog, enter DEPTMENT for the Name and click OK
e. Your inbound mapping should look like the following:
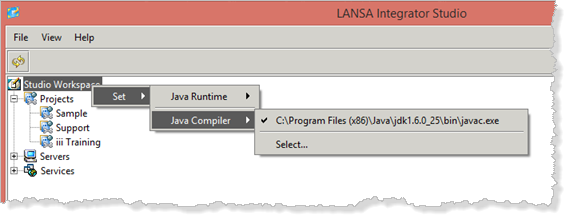
7. Create the inbound request binding. Before you use the Build function for the first time, you should do step (a) following, in order to register where Integrator Studio should locate javac.exe:
a. On the Studio Workspace tab, right click on the Studio Workspace item, and select Set / Java Compiler and then select the location for javac.exe which is shown:
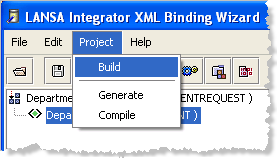
b. Now continue by selecting the Project menu and choose the Build option or use the  button.
8. Click OK on the dialog which confirms the service has been generated and compiled.
9. Using the File menu, select the Save option. Click on Yes to save the project.
10. Exit the XML Binding Wizard.
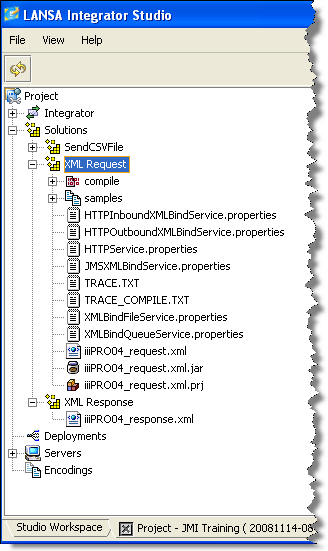
11. Switch to your project in Integrator Studio. Observe that a number of folders and files have been added to your XML Request solution: