
INT004 - Deploy the Inquiry Bindings
Deployment Concepts
You have built the inbound and outbound XML bindings files in your development environment. Now you need to deploy or publish three of the generated files to the server:
To publish these files, you will:
1. Using the Integrator Studio, review the files in your project.
a. From the root Project (iii Training), expand the Solutions folder. You should see XML Request and XML Response folders.
b. Open the XML Request and XML Response folders. You should see your XML files and project files as well as the generated jar files for your bindings

2. Your application will use the HTTPInboundXMLBindService.
This means that configuration entries need to be added to the properties file for this service. (The property file name has the form HTTPInboundXMLBindService.properties. Typically, it is located in your JSM server in the /instance/properties directory).
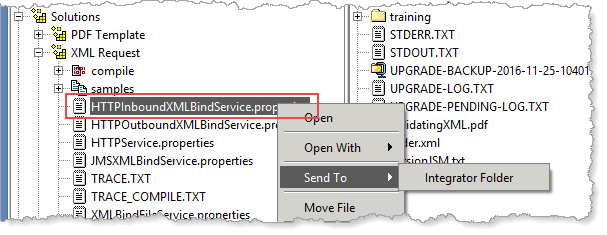
a. In the left hand panel (your project folders) expand Solutions / XML Request / samples. Select HTTPInboundXMLBindService.properties and use the context menu to select Send To / Integrator Folder.
The file will be copied to the Integrator / properties folder within your project folder.
b. In the left hand project panel, expand Solutions / XML Response / samples. Open the file HTTPOutboundXMLBindService.properties file in the Property Editor.
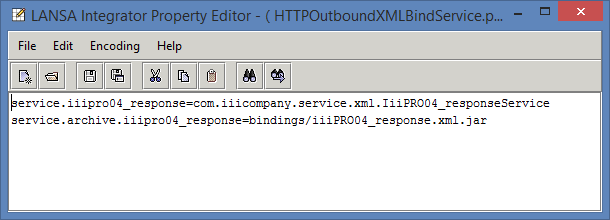
c. Highlight both lines in this file and use the Edit / Copy menu option (i.e. copy them to the Windows clipboard). Close the Property Editor.
d. In the Integrator / properties folder, open the file HTTPInboundXMLBindService.properties in the Property Editor.
e. Position the cursor below the two lines of code in this file and use the Edit / Paste menu option to add the two line which you copied. Your file should now look like the following:
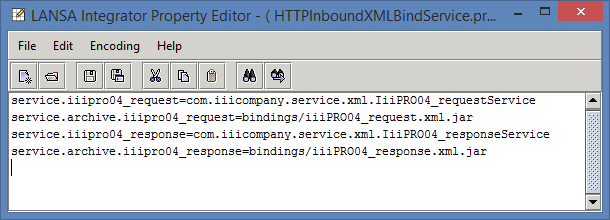
f. Save the file and close the Property Editor.
Note: the java path is case sensitive. Note also that in the example shown, the build has capitalized the name of the service e.g. IiiPRO04_responseService. This is a Java standard and cannot be changed. Throughout this workshop, you should be aware that your service names will begin with a capital letter. If this point is overlooked, your function will fail on the BIND.
3. In this step you will publish a section in the HTTPInboundXMLBindingServices.properties file on the server.
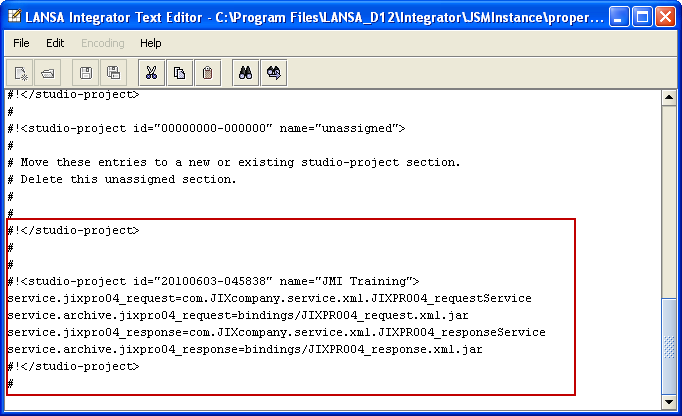
a. On the left hand project panel, in the Integrator / properties folder, select the file HTTPInboundXMLBindService.properties. Using the context menu, select Publish Section. A section for the project will be created in the services properties file on the server.
If you open the HTTPInboundXMLBindingService.properties file from the server and scroll to the end, it should now look like the following:
4. In this step you will deploy the jar files to the server.
a. In the Solutions / XML Request / samples folder, select the file iiiPRO04_request.xml.jar file and use the context menu to select Send To / Integrator Folder. This file will be copied to the Integrator / bindings folder within your project.
b. Repeat step a., expanding Solutions / XML Response / samples folder. Select the file iiiPRO04_response.xml.jar and Send To the Integrator Folder.
c. In the left panel, expand the Integrator / bindings folder.
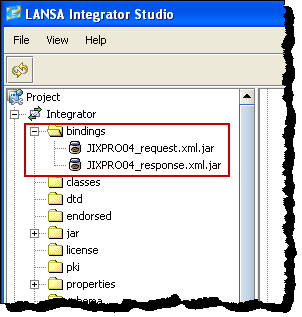
d. You should now see the jar files that you sent to the Integrator/bindings folder. One at a time, right click on each jar file in the bindings folder and select Publish File. Select Yes in the Confirm dialog.
e. In the right window pane, expand the \Instance\bindings folder. You should now see the jar files that you have published.

