1. Create a New / Form /Basic Form
Name: iiiUseWorkList
Description: Using a Working List
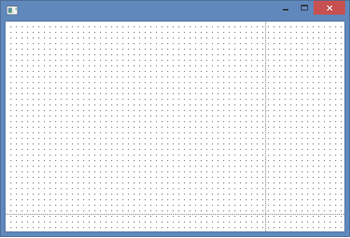
2. Select the Layout ribbon and add a Table Layout with 2 rows and 2 columns. Adjust the columns as shown:

3. From the Controls tab, drop a List View onto row 1, column 1.
a. Change the List View's Name property to Employs.
b. On the Layout ribbon, change the list's Size to Fit Both. It will expand to fit this table cell.
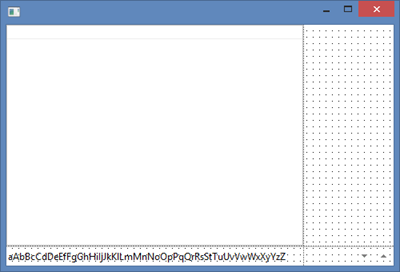
4. Drop a Status Bar (from the All Controls tab) onto row 2, column 1. It will expand to fit the width of the form and attach to the bottom of the form. This is controlled by its AutoLayout property.
Your form should look like the following:

5. On the Repository tab, locate the table xEmployee and expand its definition. Drag the fields xEmployeeIdentification, xEmployeeSurname, xEmployeeGivenNames and xEmployeeSalary into the list.
Set up the columns as shown in the table. Select a column by clicking on the column heading. The Details tab then shows this column's properties. Alternatively, use the components dropdown at the top of the Details tab.
|
Resize the fields to display their content. Your List View should look like the following:

6. Add code to the form's CreateInstance event routine to clear and then fill the Employs list view from the table xEmployee. Your code should look like the following:
Evtroutine Handling(#com_owner.CreateInstance)
Set Com(#com_owner) Caption(*component_desc)
Clr_List Named(#Employs)
Select Fields(#Employs) From_File(xEmployee)
Add_Entry To_List(#Employs)
Endselect
Endroutine
7. Create a field in the Repository called iiiTotalSalary.
a. Define it as a Decimal (15,2) field and open it in the editor.
b. Give it an Edit Mask of J ( a format of 1,234,567.89-).
c. Save the field definition.
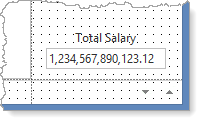
8. Drop the field iiiTotalSalary into Row 1, Column 2.
a. On the Layout ribbon, give it an Alignment of Bottom Center and Flow of Up.
b. Give it a margin Bottom of 10
c. On the Details tab, change its LabelPosition to Top.
d. Change its Width to 120
e. Adjust the width of Column 2 if necessary
Your design should look like the following:

9. Select the Employs list view. On the Details tab, notice that the List View has a default SelectionStyle of Multiple. Create an event routine for ItemGotSelection and ItemLostSelection.
10. In the ItemGotSelection event, add code to add xEmployeeSalary to iiiTotalSalary.
11. In the ItemLostSelection event add code to subtract xEmployeeSalary from iiiTotalSalary. Your code should look like the following:
Evtroutine Handling(#Employs.ItemGotSelection) Options(*NOCLEARMESSAGES *NOCLEARERRORS)
#iiiTotalSalary += #xEmployeeSalary
Endroutine
Evtroutine Handling(#Employs.ItemLostSelection) Options(*NOCLEARMESSAGES *NOCLEARERRORS)
#iiiTotalSalary -= #xEmployeeSalary
Endroutine
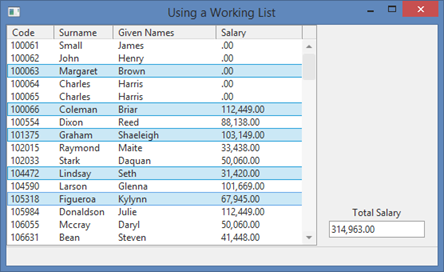
12. Compile and test your form. Select multiple entries in the List View (hold down the Control key). Total Salary should show the correct total for selected employees.
