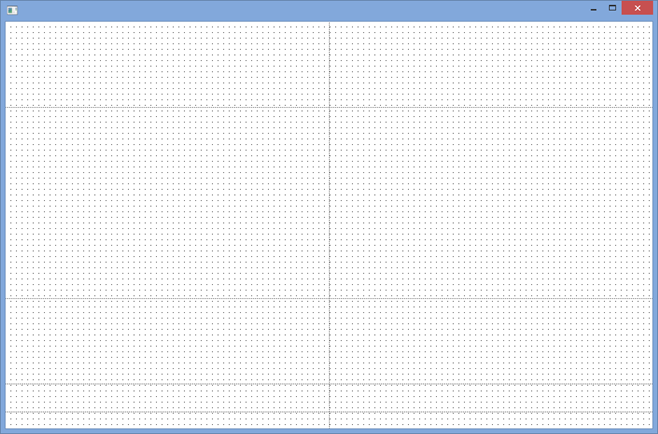
1. Create a New Form / Basic Form :
Name: iiiMaintEmployeeAndNotes
Description: Maintain Employee & Notes
2. Change the form Height to 620 and Width 940
3. Select the Layout ribbon and add a table layout with 5 rows and 2 columns.
a. Change row 5 to Units to Pixels and Height to 24
b. Adjust the rows as shown:

4. Drag a Status Bar (see All Controls tab) into column 1, row 5. It will attach to the bottom of the form and expand across both columns. This is controlled by the property AutoLocate of True.
5. Drag a Group Box into row 1, column 1.
a. On the Layout ribbon, change its Size to Fit Both. Give its margins on all sides, of 2 pixels.
b. Change Caption to Search
6. Drag a Label onto the Group Box. Change Caption to Search by. Reduce its width.
a. On the Layout ribbon change its Alignment to Top Left and Flow to Right
b. Change margin Left to 5 and margin Top to 5
If you check your Source, you will see this step has added a second table layout (Layout2) with 1 row and 1 column which is managing the components within the Group Box.
7. Drag a Combo Box onto the Group Box.
a. Change Alignment to Top Left and Flow to Right
b. Change margin Left to 5 and margin Top to 5
c. Change Name to SearchType
d. Change ComboBoxStyle to DropDownList
e. Create an ItemGotSelection event routine for SearchType.
8. Drag fields STD_NAME and STD_OBJ into the combo box.
a. Change the second column Visible property to False.
9. Drag a Label onto the Group Box.
a. Change Alignment to Top Left and Flow to Down
b. Change margin Top to 30 and margin Left to 5
c. Change Caption to Birthday Month and Name to MonthLabel
10. Drag the field iiiMonth onto the Group Box. The default field visualization should be a combo box.
a. Change Alignment to Top Left and Flow to Down
b. Change margin Top to 5 and margin Left to 5
c. Change Name to SearchMonth
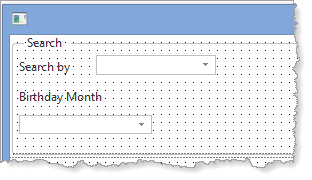
Your design should look like the following:

11. Save the form
12. Drag a push button onto the Group Box
a. Change Alignment to Top Right. Change Flow to Down
b. Change margin Right to 10
c. Change Caption to Search
d. Change Name to SearchButton
e. Create a Click event routine
13. Drag a Label onto the Group Box
a. Change Alignment to Top Right and Flow to Down
b. Change margin Top to 10 and margin Right to 10
c. Change Caption to Surname
d. Change Name to SurnameLabel
e. Change Width to 200
14. Drag an Edit Box onto the Group Box.
a. Change Alignment to Top Right and Flow to Down
b. Change margin Top to 5 and margin Right to 10
c. Change Name to SearchName
d. Change Width to 200
e. Change Height to 19
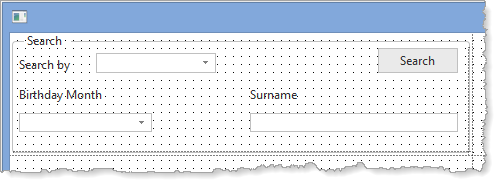
Your design should look like the following:

15. Drag a List View into Row 1, Column 2.
a. Change its Size to Fit Both.
b. Change all margins to 2
c. Change Name to EmployeeList
d. Create an ItemGotSelection event routine
16. Drag field STD_DESCS onto the List View.
a. Change the column Caption to Code.
b. Change CaptionType to Caption
17. Define a Repository field iiiFullName of type NChar, length 80, Description Fullname. You do not need to open this in the editor. The field will have the Input Attribute LC.
18. Drag field iiiFullName into the List View. Change WidthType to Remainder.
19. Save the form. Your design should look like the following:

Note: We are using field STD_DESCS to hold the EmployeeID value in EmployeeList to avoid the form variable xEmployeeIdentification changing when an entry in the list gets focus.