1. With your web page open in the editor at the Design tab, drag your Pop-Up component, iiiMessagesPopUp onto a blank space in the left hand column.
On the Details tab, change its Name to Messages. Your source now contains a Define_Com similar to the following:
Define_Com Class(#iiiMessagesPopUp) Name(#Messages) Left(276) Parent(#COM_OWNER) Top(365)
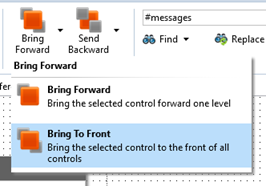
2. On the Design tab, with your pop_up component selected, use the Bring Forward button on the Home ribbon, to bring the pop-up to the front.

3. Using the Layout ribbon, change the Pop-Up's Alignment to Center and leave Flow as None.
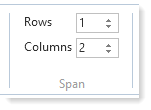
Change Span for Columns to 2.

4. Switch to the Source tab and extend the Save method to show the Pop-Up component if an error has occurred. To do this you simply need to invoke the Show method in the Messages pop-up, which will then read Sys_MsgQ.messages and populate the List control. Extend the If (#io$sts = OK) as shown:
. . . .
Evtroutine Handling(#SaveEmployee.Completed)
If (#io$sts = OK)
#xEmployee := *null
Else
#Messages.Show
Endif
Endroutine
. . . .
Note: The above code is part of the Save method in your web page.
5. Add a statement to the Save method before executing SaveEmployee, to clear messages in Sys_MsgQ, as shown:
Mthroutine Name(Save) Access(*private)
Define_Com Class(#iiixEmployeeDataServer.save) Name(#SaveEmployee)
* Clear messages
#sys_msgq.clearall
. . . .
Note: Once again, remember you can investigate components such as Sys_MsgQ using F2 to show the Features tab.
6. Compile the iiiAddEmployee web page.
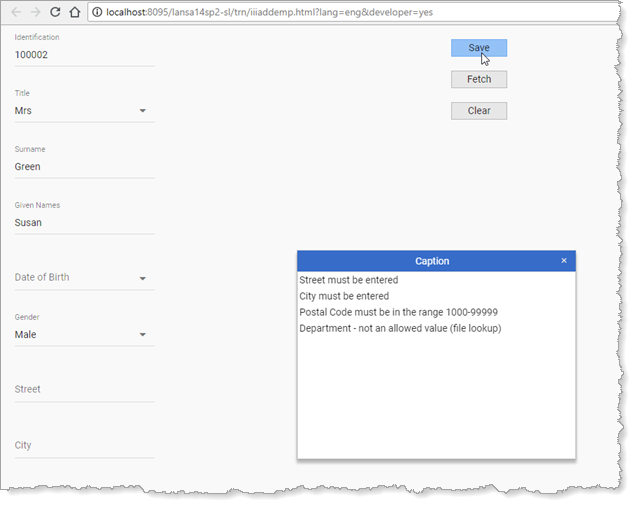
7. Execute your Add Employee web page. Enter a new employee number and click the Save button while leaving some of the input fields blank. The messages pop-up should be displayed, containing all validation error messages:
