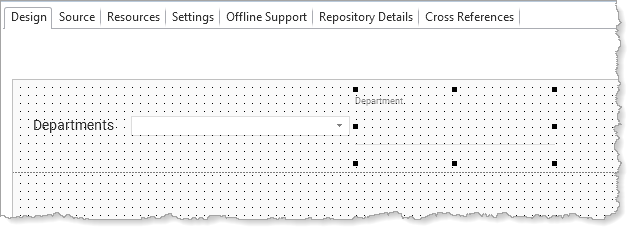
In this step you will create an initial version of the web page, containing a combo box populated with all departments.
1. Create a New / Web Page / Blank Page:
Name: iiiListBasics
Description: List Component Basics
2. Select the Layout ribbon and add a Table Layout with 2 row x 1 column to the web page.
3. Drag the row divider upwards to leave space to add labels and a dropdown across the top section of the page.

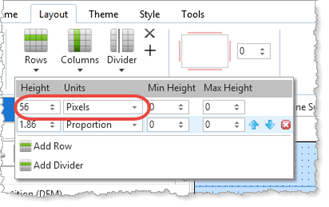
4. Select the Layout ribbon. Click on the Rows button to open the menu. Change the Units for the first row to Pixels. The top row is now a fixed height.

5. Drag and drop a Label onto the top row. On the Layout ribbon, change the Alignment to Center Left and Flow to Right.
a. Change the label's Left margin to 20.
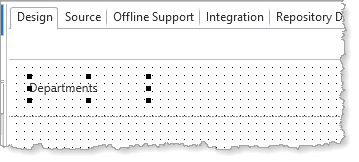
b. On the Details tab, change the label's Caption to Departments.
c. Reduce the width of the label so that it is slightly wider than it's caption.

6. Drag a Dropdown component onto the top row.
a. On the Layout ribbon, change Alignment to Center Left and Flow to Right.
b. Change margin Left to 5.
c. On the Details tab, change Name to DEPT_DD.
d. Increase the dropdown's width slightly, so that department descriptions will be fully shown.
7. Save your web page and remember to regularly save as you design your web page.

8. Find the table xDepartments on the Repository tab and expand its definition.
a. Drag field xDepartmentDescription into the Dropdown. This will create a column, named ColumnXDEPTDESC1. This name is based on the field's Identifier.
b. Drag field xDepartmentCode into the Dropdown. This will create a second column named ColumnXDEPTMENT1.
c. Change the 2nd column's ColumnVisible property to False. That is, Uncheck the checkbox.
9. From the Repository tab, drag the field xDepartmentCode onto the top row.
a. Locate the Define_Com for xDepartmentCode. Change the visual component to EditField
Define_Com Class(#xDepartmentCode.EditField) Name(#xDepartmentCode) Displayposition(3) Left(378) Parent(#COM_OWNER) Tabposition(3) Top(34)
b. On the Layout ribbon, change Alignment to Center Left and Flow to Right
c. Change margin Left to 20.

10. Drag field xDepartmentDescription onto the top row. Using the Layout ribbon:
a. Change Alignment to Center Left and Flow to Right
b. Change margin Left to 5
These fields are temporary and will be removed in a later step.
11. On the Design tab, click on a blank area to select the web page. On the Details tab, use the ellipsis button for Theme to display the Find dialog and select theme xDemoTheme. This is part of a shipped demonstration system. If you then click on the Theme ribbon you will see the color scheme which this provides. i.e. the Theme's ThemeDrawStyles.
