1. Create a New / Web Page:
Name: iiiUpdateFromAList
Description: Update from a List
Give the web page a Theme of xDemoTheme.
2. From the Layout ribbon add a Table Layout with 4 Rows and 3 Columns
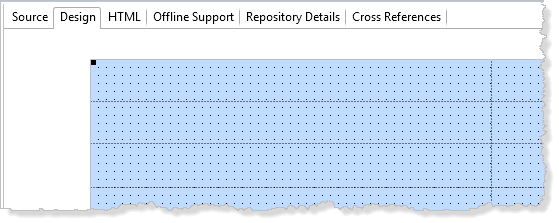
3. Move all the row dividers up to create three narrow top rows:
5. Change the top three Units to Pixels, so they are fixed height. They are given a Height value for their current height. Change the Height of Row 4 (Proportional) to 1.
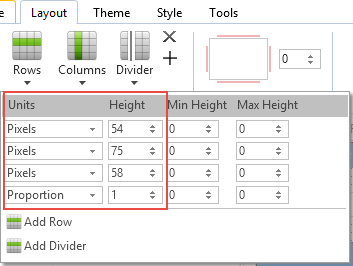
Note that you can also adjust the Height of the row on the Rows panel.
6. Add a Label to the top row.
a. On the Layout ribbon, change its Size to Fit Both. It will expand to fill the left hand cell.
b. Set its ColumnSpan to 3.
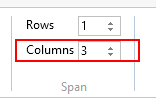
The Label should now occupy the full width of the page (3 columns) with the height of the top row.
7. Give the label a ThemeDrawStyle of Mediumtitle. This is defined in xDemoTheme as a mid-blue background with a foreground color of white.
8. Clear the Label's default Caption "Label1".
9. Repeat steps 6 to 8 to add another label to the third row which spans 3 columns and has the same height as the row.
a. Give this a ThemeDrawStyle of Mediumtitle
b. Change the label's Name property to Label_Details.
Your page design should now look like the following:
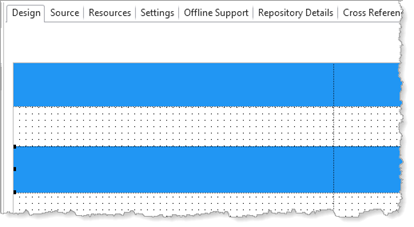
Note: With the label selected on the Design tab, you can also set it's ThemeDrawStyle from the Theme ribbon:

10. Save your web page.
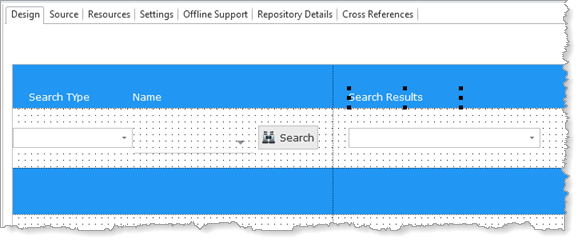
11. The next steps will add four controls to Row 2 and labels to Row 1, to give the following design:
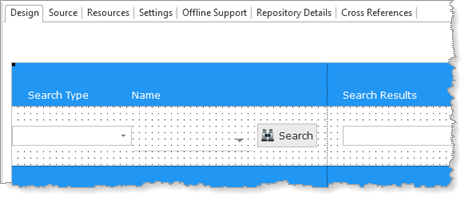
Find the Reusable Part xDemoWebDropDown on the Repository tab and add it to the Row 2, Column 1.
a. On the Layout ribbon, give it an Alignment of Center Left and a Flow of Right.
b. On the Details tab, change its Height to 25 and Width to 150.
c. Changes its Name to SearchType.
d. Create an ItemGotFocus event routine.
12. Create a Repository field iiiSearchName,
Description Search Name
Type NChar, Length 40.
Open it in the editor and add an Input Attribute of LC, to allow lowercase characters. Save and close the field definition.
If you completed the RDML Programming using Forms module, you will have created this field in exercise FRM065 - Using List Components.
13. From the Repository tab locate the field iiiSearchMonth and drag it to the right of the SearchType dropdown.
a. On the Details tab, change its Name to SearchMonth, Height to 50 and Width to 150. Change CaptionType to Caption. This removes Caption since the Caption property is blank.
b. Hold down the Control key and use the Cursor keys to position the SearchMonth dropdown just to the right of SearchType.
c. On the Details tab, make a note of the Top and Left properties of the SearchMonth dropdown. You will later position two more controls in the same position.
14. From your Favorities / Last Opened tab drag field iiiSearchName into row 2, column 1.
a. Change its Name to SearchName. Change CaptionType to Caption.
b. Change its Height to 50 and Width to 150
c. Change its Top and Left properties to the same values as the SearchMonth. This will position the SearchName edit box exactly over SearchMonth. At run time only one of these will be visible, depending on the SearchType selected.
15. Add a Push Button to row 2, column 1.
a. Click on the button to select it. Hold down the Ctrl Key and use the Cursor Keys to position it just to the right of SearchName. You can use the Top value you noted earlier to position its top edge correctly.
b. Change the button's Caption to Search.
c. Change its Name to Search.
d. Select an Image of xImageFind16.
e. Change Height to 30.
f. Create a Search Click event routine.
16. Add a Dropdown control to Row 2, Column 2.
a. Change its Alignment to Center Left and Left margin to 20.
b. Change its Width to 240 and Height to 25.
c. Change its Name to EmployeeList.
d. Create an ItemGotSelection event routine.
17. This step defines the columns for the dropdown EmployeeList.
a. Drag field iiiFullName into the EmployeeList dropdown. You created this field in exercise WBF065 - Using List Components.
b. Drag field STD_CODEL into the EmployeeList dropdown.
c. Change its ColumnVisible property to False.
d. Select the EmployeeList dropdown and change the list NotificationStyle to Program.
Note: Setting the list property NotificationStyle to Program, means that when the web page code sets focus to the first entry in the EmployeeList, the focus event will be triggered and the web page variables will be populated from that entry and the employee details will be retrieved and shown on the web page.
Your page design should look like the following:
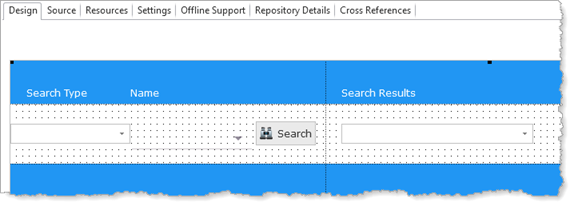
18. Save the web page.
19. Drag a Label onto the left side of the top row.
a. On the Layout ribbon, change its Alignment to Bottom Left.
b. Leave its Flow as None.
c. Change its Left margin to 20.
d. On the Details tab, change its Caption to Search Type.
e. Give it a ThemeDrawStyle of Mediumtitle.
f. Lengthen the label if necessary so that all the Caption text is shown.
20. Drop another label onto to Row 1.
a. Change its Alignment to Bottom Left.
b. Change its Flow to None.
c. Change its Left margin to 150. This should position it above the iiiSearchMonth dropdown field visualization.
d. Change its Name to Label_Month.
e. Change its Caption to Start Month.
f. Give it a ThemeDrawStyle of Mediumtitle.
21. Drop another label onto Row 1.
a. Change its Alignment to Bottom Left.
b. Change its Flow to None.
c. Change its Left margin to 150. It should be positioned over Label_Month.
d. Change its Name to Label_Name.
e. Change its Caption to Name.
f. Give it a ThemeDrawStyle of Mediumtitle.
Only one of these labels will be visible at run time.
22. Drop another label onto Row 1, Column 2.
a. Change its Alignment to Bottom Left.
b. Change its Flow to None.
c. Change its Left margin to 20.
d. Change its Caption to Search Results.
e. Change its ThemeDrawStyle to Mediumtitle.
f. Adjust its length so that the Caption is displayed.
23. Save your web page. You design should look like the following:
