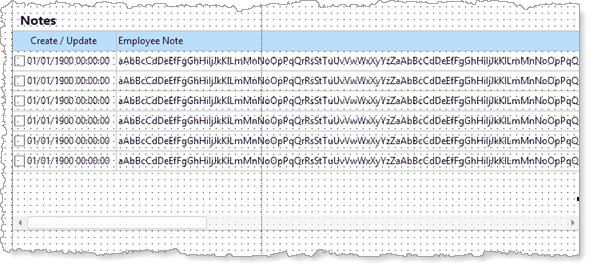
In this step, you will complete the web page design for the lower area of the web page, which will contain employee details and a list of employee notes for a selected employee.
1. Locate the table xEmployee on the Repository tab and expand its definition.
a. Hold down the Control key and select fields: xEmployeeIdentification, xEmployeeTitle, xEmployeeSurname, xEmployeeGivenName, xEmployeeStreet, xEmployeeCity, xEmployeeState and xEmployeePostalCode. Drag them into Row 4, Column 1.
b. While these fields are selected, set their Alignment to Top Left and Flow to Down
c. Change margin Top to 5 and margin Left to 20.
2. Change the Employee ID field to ReadOnly = True.
3. Add a Label to row 4, Column 2. Change its Caption to Notes.
a. Select the Styles ribbon and change its Font to 12pt, Bold.
b. On the Layout ribbon, change Alignment to Top Left and Flow to Down.
c. Change its margin Top to 20 and margin Left to 10.
4. Add a List component to row 4, column 2.
a. Change Alignment to Top Left and Flow to Down.
b. Changes Size to Fit to Width.
c. Change margin Top to 20
d. Change Span to 2 columns
e. On the Details tab, change Height to 250.
f. Change Name to NotesList.
g. Change Checkboxes property to True.
5. Save your web page.
6. On the Repository tab, locate the table xEmployeeNotes and expand its definition.
a. Drag field xEmployeeNotesCreateUpdate into list NotesList.
b. Change ColumnCaption to Create / Update and ColumnCaptionType to Caption. Reduce the column width.
c. Drag field xEmployeeNote into list NotesList
d. Change ColumnCaptionAlign to Left
e. Change ColumnUnits to Proportion
f. Drag field xEmployeeNoteGUID into list NotesList
g. Change ColumnVisible to False
Your design should look like the following:

7. Save your web page.