In order to upgrade your application using a new MSI you will Update the LANSA Stack using the procedure described in the Cloud tutorial. If you use this method as described, your EC2 instances may be terminated by the Elastic Load Balancer because they fail to respond quickly enough to the health check. A new instance will be created in its place, but it lengthens the whole process.
The best way to ensure that no instances are terminated, nor new ones created, is to suspend all processing in both Auto Scaling Groups. This may only be achieved using either the AWS Console, AWS SDK or command line. This example describes how to do it using the AWS command line. You will first need to install and configure it as described here: AWS Command Line Installation Guide .
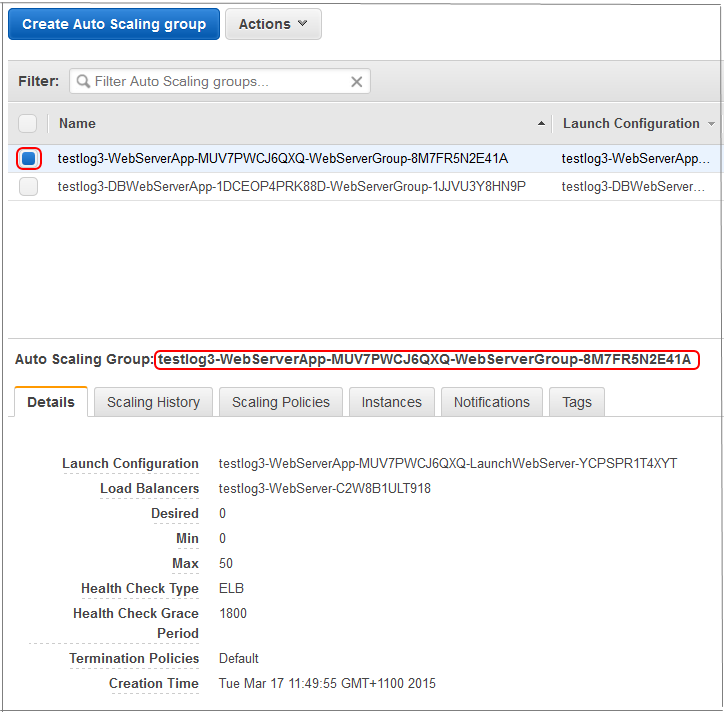
Use the AWS console to obtain the names of your auto scaling groups. Navigate to the EC2 pages and then Auto Scaling Groups. Select one of your Auto Scaling Groups and copy the name from the Details tab sheet:

In a Windows command prompt type the following:
aws autoscaling suspend-processes --auto-scaling-group-name testlog3-WebServerApp-MUV7PWCJ6QXQ-WebServerGroup-8M7FR5N2E41A
Do the same with the other Auto Scaling Group.
aws autoscaling suspend-processes --auto-scaling-group-name testlog3-DBWebServerApp-1DCEOP4PRK88D-WebServerGroup-1JJVU3Y8HN9P
Now you may upgrade the DB Web Server, followed by the rest of the Web Servers as described in the tutorial. The Auto Scaling Group will ignore all requests from the Elastic Load Balancer.
When all installs have fully completed (ensure that the CPU utilization has returned to nearly zero), you may resume processing in the Auto Scaling Groups:
aws autoscaling resume-processes --auto-scaling-group-name testlog3-WebServerApp-MUV7PWCJ6QXQ-WebServerGroup-8M7FR5N2E41A
aws autoscaling resume-processes --auto-scaling-group-name testlog3-DBWebServerApp-1DCEOP4PRK88D-WebServerGroup-1JJVU3Y8HN9P