
1. On the Favorites / My App tab, locate the dialog component MY_ContactDetails and open it in the editor.
2. It will open showing the Design tab. Open the Outline tab, which shows that the dialog displays Contact data as Edit Fields on a panel, named Details. You will make a simple changing by reversing the display position of fields xContactJobTitle and xContactCompany.
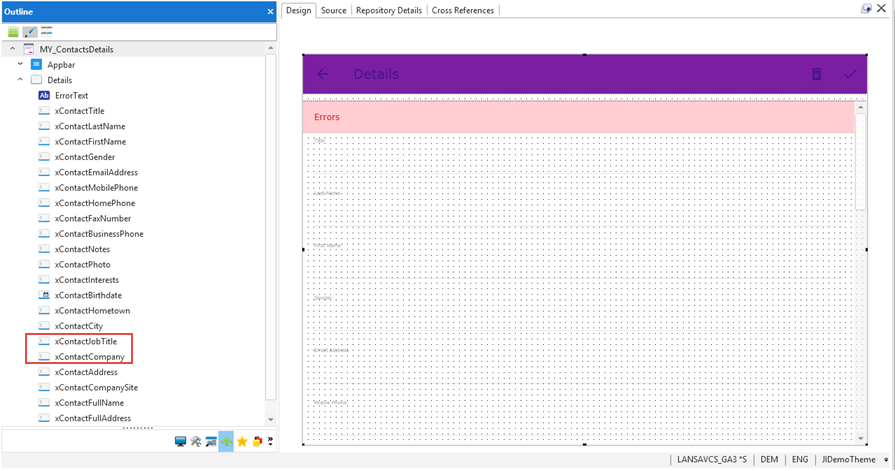
5. Select xContactCompany on the Outline tab and then open the Details tab, which will display the field's properties:
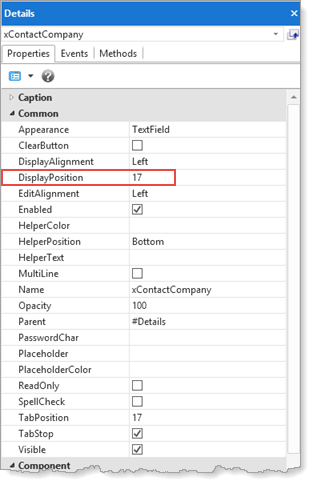
3. Change DisplayPosition to 17. This will position Contact Company before Contact Job Title.
4. Compile the MY_ContactDetails component and close the component.
5. Execute the web page (e.g. MY_MAIN) and ensure that the Contact Details dialog now displays Contact Company before Contact Job Title
You have changed and recompiled one component, the Dialog MY_ContactDetails.
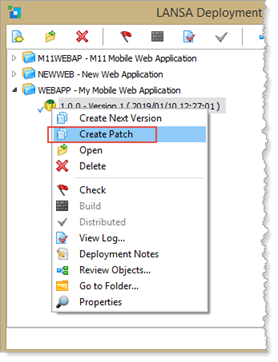
6. Open the Deployment Tool from the Tools ribbon. Select the V1.0.0 - Version 1 package for the WEBAPP application. Using the context menu, select Create Patch:
7. Enter a suitable Description for the patch:
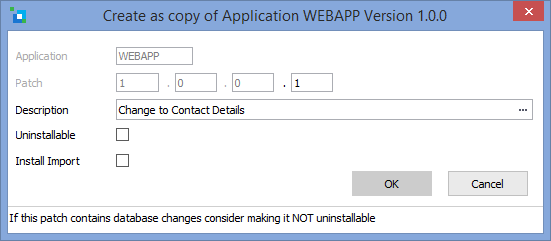
If the Install Import checkbox is selected, standard imports and repository definitions are included in the patch. For further details on creating patches see Create a Patch.
8. Click OK to create the patch.
The Package Maintenance window is opened. If necessary, you could now change "Files with Special Processing" and the objects included in the patch. No changes are required in this case. Building the patch will detect the changed MY_ContactDetails dialog component (a JavaScript file) and include this in the patch.
9. Save and close the Package Maintenance window.
10. With the patch selected, click Build toolbar button to build the patch package.
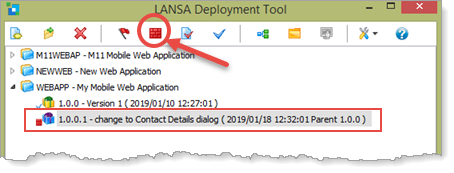
11. The build log will be displayed when the build completes.

Check there were no Fatal errors and close the build log. The log can be re-opened using this  toolbar button.