Refer to the install guide for the actual steps involved in installing Visual LANSA on a Data/Application Server, but following is an outline of options to select and items you will need to take note of for setting up the Web Server.
1. Assuming that you haven't already installed Visual LANSA on the Data/Application server, install Visual LANSA and select a Custom Install. Press Next>
2. The LANSA Features dialog is displayed for you to select the features to be installed.
a. Deselect Web Server and Integrator.
b. Ensure that these features have been selected:
Visual LANSA
Visual LANSA Development
Web Administrator
LANSA Open
LANSA Open Core Files
Translation Tables
and
LANSA Communications
3. Press Next> to continue with the install.
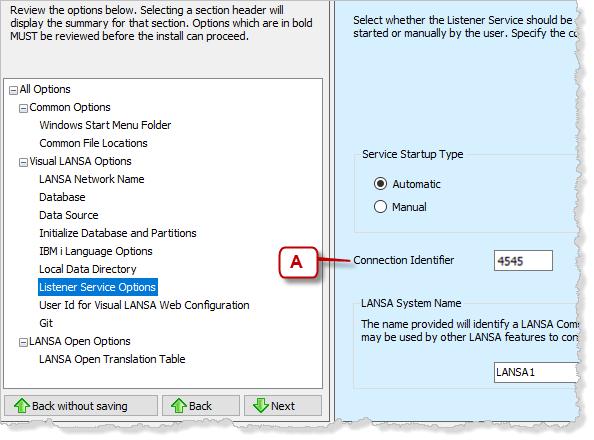
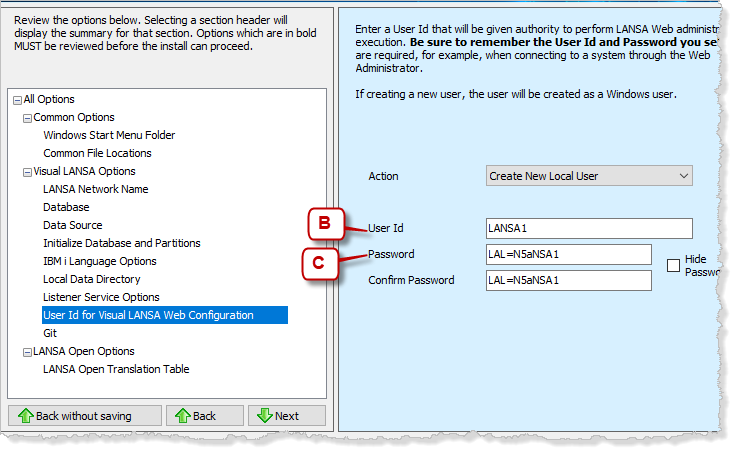
4. The Specify Options list is displayed. Take a note of the values marked A, B and C in the following dialog graphics.
a. Select the Listener Service Options and take a note of the TCP/IP port number or Connection Identifier as marked A in the following screen capture:

b. Select the User Id for Visual LANSA Web Configuration and take note of the values of B & C as shown.

5. Complete the Visual LANSA installation on the Data/Application server.