3.9.1 Deploy Any List
In order to deploy your application to the cloud, you need to create a repository list of the objects to be deployed. Only those objects in the list will be deployed no matter what other changes have been made to your application.
The cloud environment must be set up before deployment. If you have installed a Visual LANSA Evaluation system or if you have paid for Premium tier features, the environment is automatically set up for you. It is also possible to set up a cloud environment yourself. For details of how to do this, refer to the Deploying LANSA Applications on Windows using the Deployment Tool guide.
To deploy an application:
1. Create a repository list for your application. Note that the list needs to be a Favorite.

2. Add all your objects to the list. Make sure you include all the tables and server modules which your application uses.
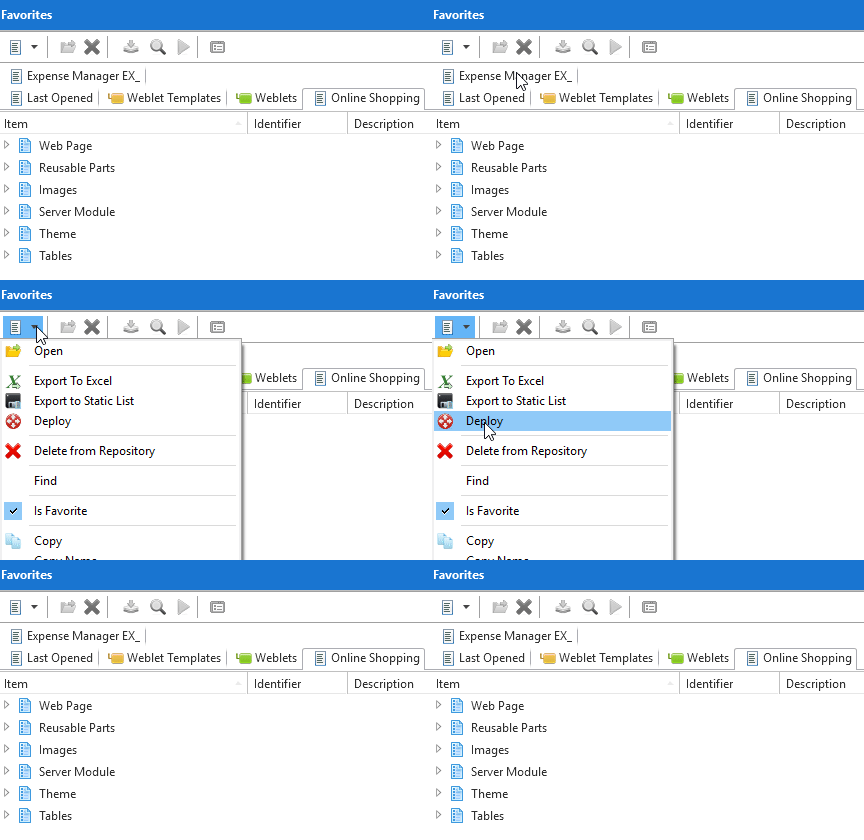
3. Then select your list in the Favourites tab and choose Deploy from the dropdown on the top left:

4. The Deploy menu option deploys the current repository list. It creates a package called version 1.0.65535 which you can see in the Deployment Tool for the application named the same as the IDENTIFIER of your list, for example OL13 for the list created in Step 1 above. Note that the Deploy menu option does not construct an MSI, it only assembles all the objects from the repository list.

5. When the deployment has completed, use the application URL to check the changes you have deployed.
Note that you can deploy multiple lists into the cloud environment. Each application will continue to work provided that the lists are mutually exclusive. However, when the cloud scales out, it only installs the last list deployed so you should limit your deployment and testing to a single deployed list.