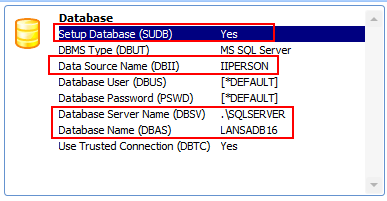
1. In the Database group box, open each of the settings detailed below. Set the values shown, adjusting for your application and database.
a. Data Source Name = IIPERSON (i.e. your application name)

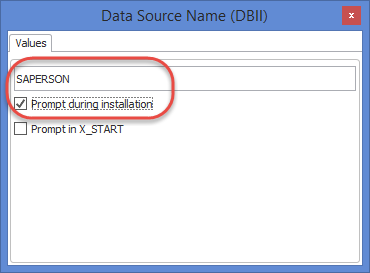
2. Select the Prompt during installation checkbox. This will allow changes to be made during the install if required. You must also select Display DBMS Dialog in the MSI Installation Settings. The XALONE template sets the Display DBMS dialog to 'Y'.
a. Setup Database (SUDB) = Yes
b. Database Server Name = .\SQLSERVER. Note the leading full stop. The database server name was displayed when you connected in SQL Server Management Studio, in Step 1. e.g. <PC name>\SQLSERVER
c. Database Name = LANSADB11: the name of the new database which you created in Step 1.
Leave all other entries with their default values.

3. Select the Prompt during installation checkbox for each of the above parameters.
The database setting are likely to change when installing on different machines.
4. Click OK to save the changes.