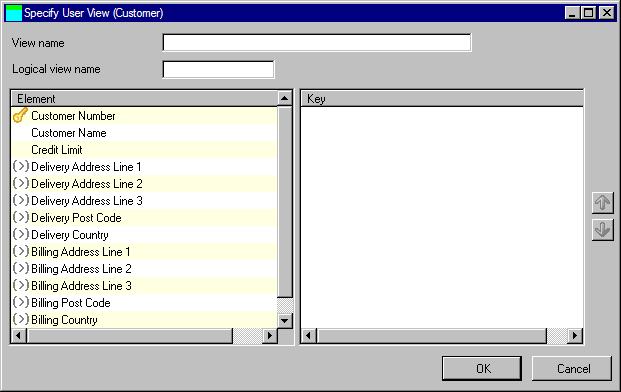
To create a user view, click the  button on the Specify User Views toolbar. The Specify User View dialog is displayed:

You must specify a Name for the view. It can be up to 40 characters of mixed case.
A Logical View Name should be specified if the physical file name of the affected entity is longer than the maximum number of characters allowed (10 if the *RPGIV setting is enabled in your system, 8 if it is not). If the physical file name of the affected entity is up to the maximum length allowed, no logical view name is required: the modeler will automatically generate a logical view name when the entity is built.
The left-hand side of the window shows a list of all the elements within the entity, including those that have been inherited as the result of relationship with other entities.
The right-hand side of the window will contain the key you select to control the sequence of the data displayed in the user view.
To specify the key for the view, double-click elements in the left-hand Elements list or drag-and-drop them from the left-hand Elements list onto the right-hand Key list. As elements are added to the right-hand Key list, they are removed from the Elements list. Similarly, elements can be double-clicked or dragged and dropped from the Key list to the Elements list to remove them from the key.
If the view has more than one element as the key, the key sequence can be changed by using the  and
and  buttons to the right of the Key list.
Press OK to create the view. After validation, the Maintain User Views window is redisplayed with the new user view shown in the list of views.
Press Cancel if you do not wish to create the user view. The Maintain User Views window will be redisplayed.