WAM060 - Employee Maintenance using Advanced Weblets
In this step you will:
1. Open the Details WebRoutine in the Design View. The Details tab should be shown. If necessary select the Details tab and save your WAM to make this the default.
2. On the Details tab, select anywhere in the table containing the fields and use the context menu to select Table Items/Add Rows…. to add 1 row to the bottom of the table.
3. Click in the left hand cell of the new row and set its align property to left.
4. Drag and drop a Push Button with Image into the bottom left cell of the table. Set up the button as follows:
|
5. This step adds a Message weblet to this page:
a. Select the tab pages weblet. Move the cursor right and press enter. This should create a blank space above the tab pages weblet.
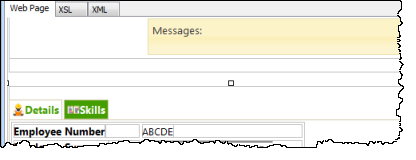
b. Drag and drop a Messages weblet into the space immediately above the Tab Pages weblet. Your design should now look like the following:

6. Select the Messages weblet and set its target_window_name property to _top. This will route messages from this page to the messages weblet on the page in which it is embedded.
Save your changes.
7. Retest your WAM. The update employee details logic has already been included in the Details WebRoutine. You should now be able to change employee data and save the changes. Try making an invalid change, such as a blank surname.
8. To handle update of employee skills the CASE loop in WebRoutine Details requires new logic.
a. Define a work field SC based on field SKILCODE
b. Add field SC to list EMPSKLS as a hidden field. Your code should look like the following:
Define Field(#sc) Reffld(#skilcode)
Def_List Name(#empskls) Fields((#SKILCODE *out) #GRADE #COMMENT #DATEACQ (#dateacqr *hidden) (#empno *hidden) (#sc *hidden)) Type(*Working) Entrys(*max)
c. Change the existing logic which builds the employee skills list, to populate the hidden field SC. Your code should look like the following. The new code is shown in red.
Select Fields(#empskls) From_File(pslskl) With_Key(#empno)
#sc := #skilcodeAdd_Entry To_List(#empskls)
Endselect
d. Add new logic to update employee skills based on the following:
Update fields in list EMPSKLS in file PSLSKL with key EMPNO and SKILCODE. Go to next line on validation error.
Your code should look like the following:
When (= S)
Selectlist Named(#empskls)
#skilcode := #sc
If (#dateacqr *NE *zeroes)
Update Fields(#empskls) In_File(pslskl) With_Key(#empno #skilcode) Val_Error(*next)
Endif
Upd_Entry In_List(#empskls)
Endselect
If_Status Is(*okay)
Message Msgtxt('Skills for ' + #empno + ' were changed')
Endif
Endcase
8. Compile your WAM.
9. Open the Details WebRoutine in the Design view.
a. On the Skills tab, select the grid and move to the right using the cursor keys and press enter. This will position the cursor immediately below the grid.
b. Use the context menu, Insert HTML, Table to insert a table with one row and two columns.
10. Click in each cell of the new table and change the align property to left.
11. Drag and drop a Push Button with Image into the right hand cell and set it up as follows:
|
12. Remove the * place holder characters from the right hand cell. Leave them in the left cell.
13. Click on the Details tab page to select it and then Save your changes.
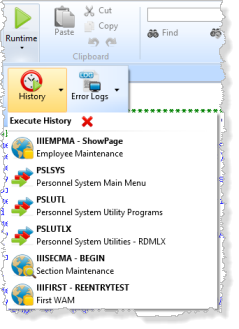
14. Re-test your WAM. Note that on the Home ribbon, you can use History button in the Runtime gallery, to re-run any VL component.
