WAM075 - Using a Tree View Weblet
Unlevelled List
In an unlevelled list each entry tells the Tree View exactly where it fits in the tree structure by specifying its parent ID. As a minimum, an unlevelled list must contain columns with the following data:
|
The Tree View processes the list entries in the supplied order and cannot add an entry to a parent that doesn't exist. It is your responsibility to ensure the list is sorted so that parent items come before their children and items at the same level are in display order.
Additional list fields may be used to control the tree view behaviour and appearance:
Refer to Tree View (std_treeview_v2) Properties for further details.
Your WAM will build an initial list based on the department table (DEPTAB), so that initially the tree will contain a single level. You will later add routines to handle expanding the tree view at each level.
Note: The supplied code can be copied from the WAM tutorials in the Visual LANSA online guide. Most of the code to support the tree view is provided, but you should ensure that you review it in detail so that you become familiar with the concepts.
1. Create a new WAM:
Name: iiiTreeView
Description: Using a Tree View Weblet
Layout Weblet: iiilay01

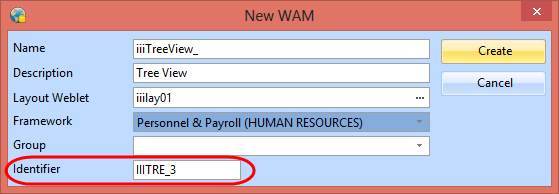
Make a note of the Identifier which is assigned to this WAM. You will need to use the Identifier when setting the WAM Name field in the working list which builds the tree view. JavaScript will call the WAM/WebRoutine to display details for the selected level. This requires the WAM Identifier, not the Long Name.
2. Define the fields and lists required to support the tree view
Define Field(#listid) Reffld(#std_name)
Define Field(#listpid) Reffld(#std_name)
Define Field(#listcapt) Reffld(#std_desc)
Define Field(#onsubid) Reffld(#std_name)
Define Field(#onsublvl) Reffld(#std_code)
Define Field(#haschld) Reffld(#std_flag)
Define Field(#selwam) Reffld(#std_name)
Define Field(#selwrn) Reffld(#std_name)
Define Field(#currid) Reffld(#std_name)
Def_List Name(#emptree) Fields(#listid #listpid #listcapt #haschld #selwam #selwrn) Type(*Working)
Def_List Name(#ancestor) Fields(#listid) Type(*Working) Entrys(3)
The list named ancestor will be explained in a later step.
3. Define a WebRoutine deptview which:
Note:
Your code should look like the following. Substitute your initials for iii.
WebRoutine Name(deptview)
Web_Map For(*both) Fields((#emptree *json))
Web_Map For(*both) Fields((#ancestor *json))
Clr_List Named(#emptree)
Select Fields(#deptment #deptdesc) From_File(deptab)
#listid := #deptment
#listcapt := #deptdesc
#listpid := *blanks
#haschld := Y
#selwam := iiiTRE_2
#selwrn := DEPDET
Add_Entry To_List(#emptree)
Endselect
Endroutine
4. Compile the WAM and open the deptview WebRoutine in the Design view.
5. Drop a tree view weblet onto the page. Select the tree view weblet and drag the center right hand "handle" to make the tree view wider to allow room for three levels and descriptions to be displayed.
6. Set up the tree view properties as follows:
|
*** select the image using the Ellipsis button. Drill down by selecting the normal and 16 folders.
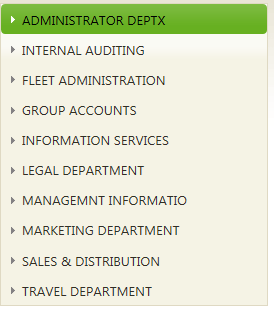
7. Save your changes and run the WAM in the browser. Your tree view should display description for all departments:
