WAM085 - Enhancing the User Interface
In this step you will change the layout of the Enter Employee Details page, by moving the fields into logical groups on the page. You will also insert <fieldset> tags around each group of fields.
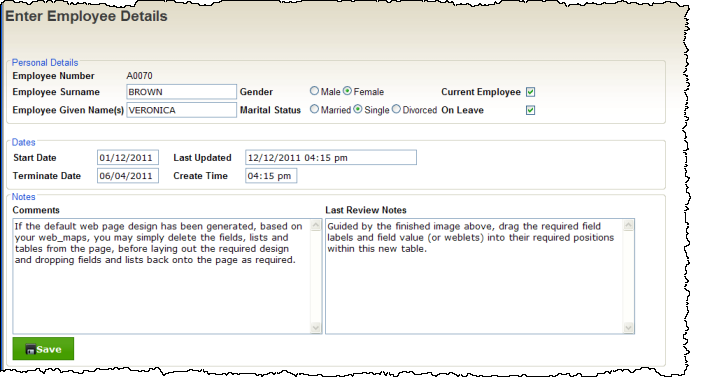
The finished page design (showpage) will look like the following:

Figure 1. Enter Employee Details
To redesign this web page, follow the details steps provided. However, bear in mind that other approaches could have been followed:
Editor Undo / Redo Feature
The editor which enables you to design your web page is actually editing the underlying XSL code which will transform XML into HTML at runtime. The Undo/Redo feature has been enhanced in V13 SP1 to provide more powerful and easy to use functionality.

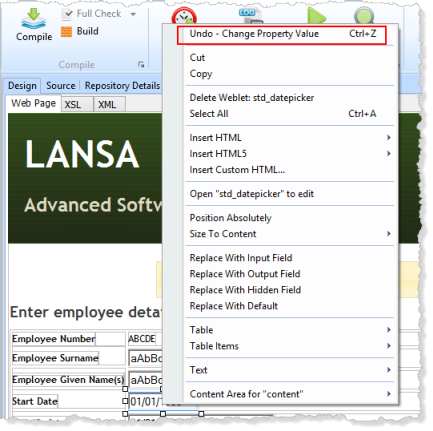
The Start Date was changed, making the dateFormat = dd/mm/yyy. The context menu shows that Undo will remove the property change. Alternatively, Ctrl+Z could be used.

Another option is to use the Undo button in the Clipboard group on the Home ribbon.

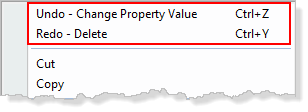
Details of a number of changes are stored. The above example shows that an Undo was performed after a field label had been deleted. Redo will delete this label text again. The Start Date property change could also be removed.
1. Open the showpage WebRoutine in the Design view.
2. In this step you will create the Personal Details area containing employee number, surname, given name, gender, marital status, current employee and on leave fields.
Insert a table at the bottom of the page with 3 rows and 6 columns
3. Guided by the finished image above, drag the required field labels and field value (or weblets) into their required positions within this new table.
Note: You may find an easier approach is to Cut (Ctrl+X) each element from the existing table and then Paste (CTRL+V) it into the new table.
4. In the new table, select each table cell (that is, the <td> tag) containing a field label and set its class property to caption.
5. Remove the place holder characters where necessary.
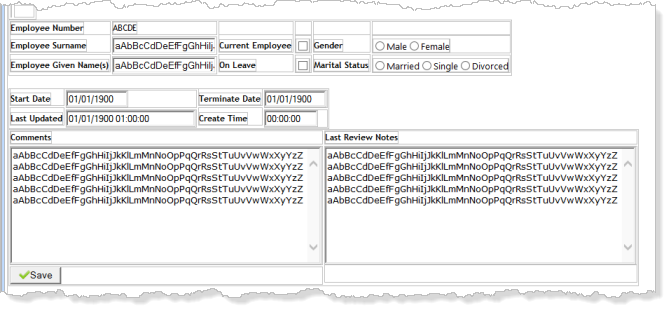
Your page should now look like the following:

6. Save your changes.
7. Click in the top row of the original table, which is now empty, and use the context menu to use Table Items / Delete Rows…. to delete 3 rows. Repeat this step as necessary in the other empty rows, where you have dragged fields into the new table.
8. Insert another new table at the bottom of the page, with 2 rows and 4 columns. Drag the date and time fields and labels into the new table, or Cut and Paste each item.
9. Select each cell containing a label and change its class to caption.
10. Remove the placeholder characters. Your page should now look like the following:

11. Once again make the original table smaller by deleting the empty rows. This step is optional, since you will eventually delete this whole table. Deleting rows makes it easier to drag items to the new table.
12. Insert a new table at the bottom of the page with 3 rows and 2 columns. Drag the comment and notes fields and labels into this new table. Review the image in 16. before you complete this step.
13. Select each cell containing a label and change its class to caption. Remove the place holder characters.
14. Add some ** characters to the original table, so that it remains easily visible and then drag the Save button into the bottom left hand cell.
15. Drag the Save button into the bottom left cell of the new table.
16. Save your changes. Your page should look like the following:

17. Select the corner of the original table to select the whole table, and delete it.
18. Save your changes.