
The menu needs to be setup with WAM name and WebRoutine name for four WAMs. For the first four WAMs using the common layout, the information is as follows. Replace iii with your initials.
|
0. Before you continue with this exercise, display your WAMs on the Repository tab and note the Identifiers for these WAMs:
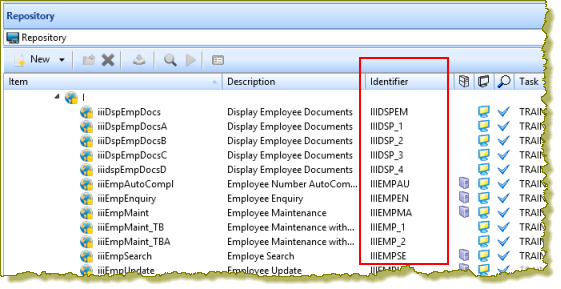
Visual LANSA allocates a unique 10 character Identifier to each component you create (if Long Names is enabled at partition level). When calling the WAM directly in a URL, the Identifier, not the long names must be used.
1. Open layout iiilay01 in the editor. In exercise WAM025 you added the jQuery UI Menubar weblet to this layout and set up links to a number of LANSA website pages.
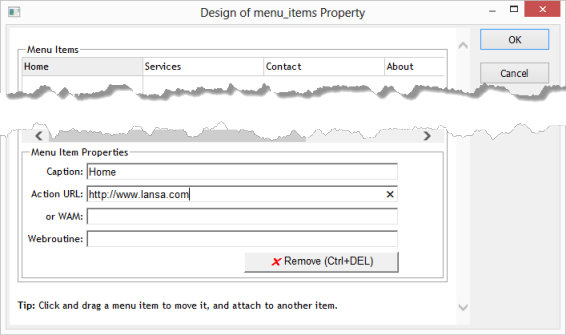
2. Select the menu bar weblet and use the Ellipsis button for the menu_items property to open the Design of… dialog, which should look like the following:
3. In this step you will define an Applications top level menu item, underneath menu item Home and then drag it into the top level, between Home and Services.
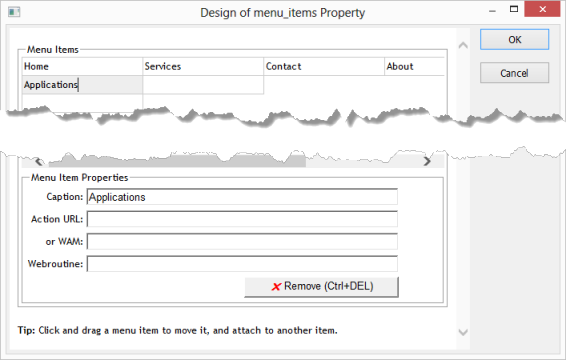
Click in the menu item below Home and in the Menu Item Properties, enter Applications. The Design of menu_items Property dialog should now look like the following:
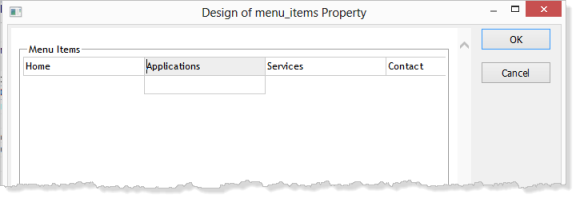
4. Click on the Application menu item and hold down the left mouse button to drag Applications into position between Home and Services. Position the cursor on the left hand side of Services when you release the left mouse button. Your design should look like the following:
5. Click on the menu item Applications to display the sub-menu item underneath it. Enter Employees in the Menu Item Properties Caption. Your design should look like the following:
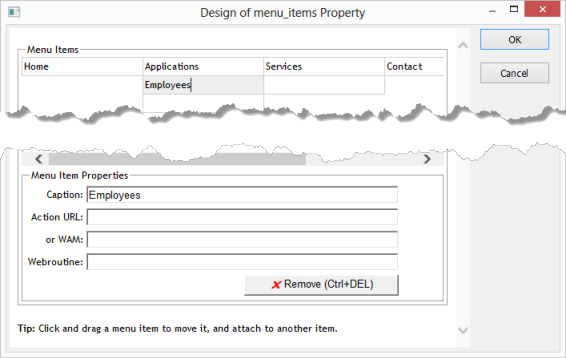
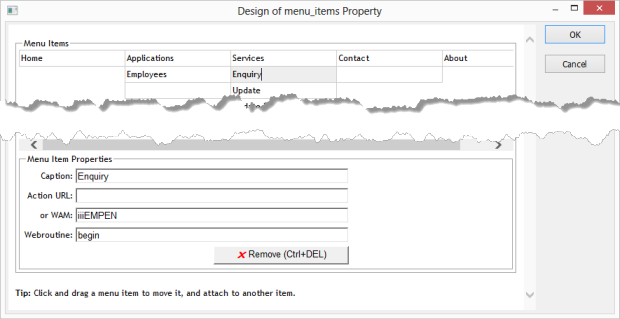
6. Click in the menu item to the right of Employees. This means you will be defining a sub-menu for Employees, which will be shown during the design step, under Services. Define Enquiry as:
|
Note: Your WAM Identifier may be different to the example shown.
Your design should look like the following:
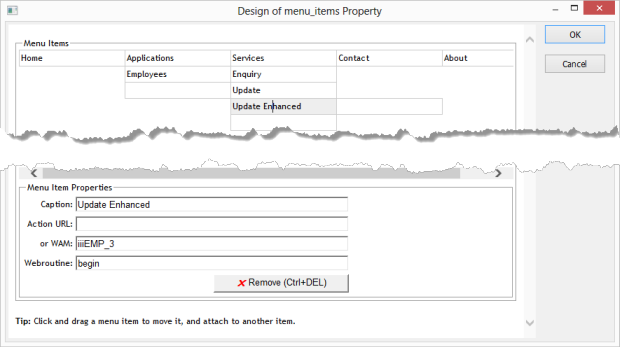
7. Continue by defining the next three sub-menu items for Employees, in the column under Services. Refer to the New WAMs/Menu Items table at the beginning of this step for details. Your dialog should now look like the following:
8. Click OK to save the changes and close the dialog. Your menu should look like the following:

9. Save your layout.