2.5 Create an Application
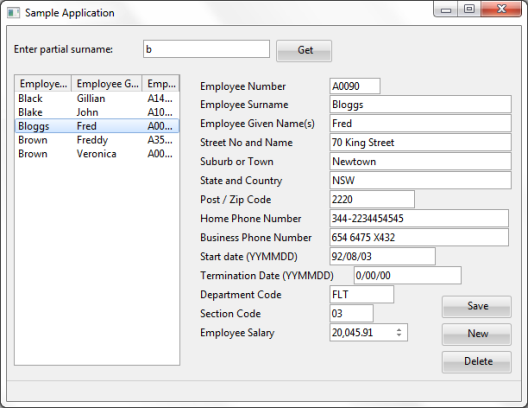
This section shows you how to create an application used to maintain fields in a file. The application consists of a list of employees and fields showing employee details. You can limit the entries in the list by entering a partial surname. You can use the application to view and maintain the details of existing employees, to add new employees and to delete employee information.
You can also choose to create the application using templates as described in 2.6 Create Applications Using Templates.
In this instance, it is created manually to show you what is involved.
The application uses data from the Personnel System Demonstration PSLMST file which is part of the LANSA DEM partition.
Note: The Personnel Demonstration System, used in these examples, has been upgraded. You can use the replacement details (field names generally commence with 'x' with these instructions.
Before you can create this application, you must have a LANSA development license. If you don't have a license you could download a LANSA Trial version which comes with a 60-day license.
To create this application yourself, you need to create field PARTNAME which uses SURNAME as the reference field. The application is created in these steps:
Step 4. Compile and run the Program
You start creating an application by creating a form or a dialog. The dialog will become your application's window when it is running.
To create a form select New from the File tab, then select Dialog from the New list.
The New Dialog is displayed. Enter the name and the description:
-
Name: DEMCOM01.
-
Description: Sample Application
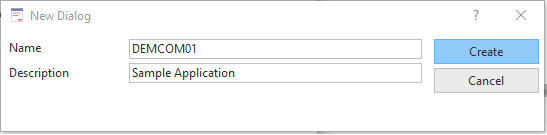
Click the Create button.
View the Source Code
If you now bring up the Source view, you will notice that the component definition statement for the form has been created automatically.
Begin_Com Role(*EXTENDS #PRIM_DLG)
End_Com
A Visual LANSA application always starts with a FUNCTION statement followed by a BEGIN_COM statement defining the form.
The END_COM statement ends the component definition. It is always the last statement in a Visual LANSA application.
Note that if the standard form (STD_FORM) definition on your system has been modified, you may see other statements as well. For more information, refer to Modify Default Component Behavior in 2.4 Work with Components.
In Visual LANSA you create the interface of the application before you write the code.
2a. Set the Form's Properties
|
|
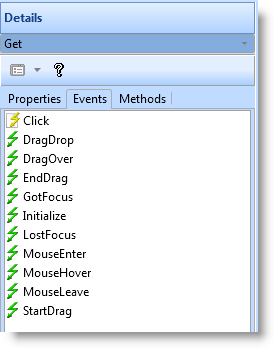
To view the form's properties, select it on the desktop or in the Outline tab. Bring the Details tab topmost. It consists of a list of properties and a list of events for of the form. The list of properties shows the name of the property on the left and its value on the right. You can change the value of any of the properties except the name of the form. You do this by selecting a property and then specifying its value. You can either type in values, or if they are predefined, you can select them from a list.
|

Write the Caption
The first property you need to change is the form's Caption property to create a title for your window:
1. Click on the Caption property.
2. Type Employee. As you type it, the new caption is displayed in the title bar of the form.
Size the Form
Next make the form a bit larger than the default size:
1. Select it and move the cursor towards its edge.
2. When the cursor changes to a double-arrow, drag the edges with the left mouse button pressed down.
3. Alternatively, you can change the Height and Width properties of the form.
You can keep resizing the form as required as you add controls and fields on it.
2b. Add Fields and Controls
This section shows you how to add the required fields and controls to the form.
#Partname field and a button
First add the #PARTNAME field which uses #SURNAME as the reference field.

To add the PARTNAME field:
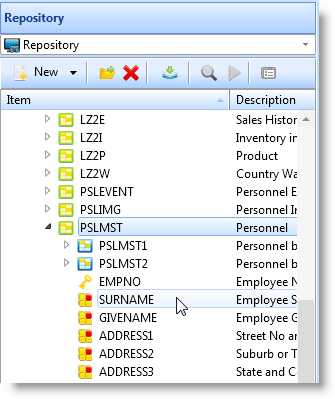
1. Start by locating it in the Repository.
2. Drag the PARTNAME field to the form or double-click it.
3. Bring up the Details tab and make its LabelType property Caption.
4. Type 'Enter partial surname:' in its Caption property
Command Buttons
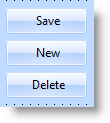
In addition to the Get command button used with the partial surname field, you need these command buttons to work with the employee details:
To add buttons to the form:
1. Select the Controls tab.
2. Drag push button to the form four times. Alternatively you can double-click it four times.
3. Change the captions of the buttons.
a. Make the caption of the first button Get
b. Make the caption of the second button Save
c. Make the caption of the third button New
d. Make the caption of the fourth button Delete
4. Change also the default names (#PHBN_n) of the buttons to match the caption. In this way it will be easier to identify the buttons when you write event routines for them.
5. Position them on the form as shown in the picture in Create an Application at the beginning of these steps.
List View
Next create the list view which shows the employees:
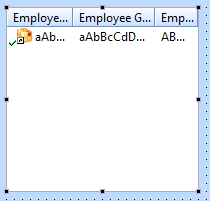
To create the list view,
display again the the Controls tab. Drag a list view control (PRIM_LTVW) to the form or double-click it. Now you need to create the columns for the list. To do this:
|
|
1. Locate the file PSLMST in the Repository tab. 2. Click on the plus sign in front of it to display the fields defined for this file. 3. Make sure the list view has the focus in the Design view. In the Repository tab double-click these fields to add them to the list view (or drag them): SURNAME GIVENAME EMPNO When you add a field to a list, a list column is created.
|
Display the Outline tab. The list view columns are named LVCL_n:
-
LVCL_1 is the column created from the #SURNAME field
-
LVCL_2 is the column created from the #GIVENAME field
-
LVCL_3 is the column created from the #EMPNO field
You can rename these fields if you want to use more descriptive names.
|
|
In the Design view notice how the list view shows that a column has been added to it. 1. Now size the columns as shown by dragging them. 2. Display the Details tab for all three columns and set their CaptionType property to ColumnHeadings. |
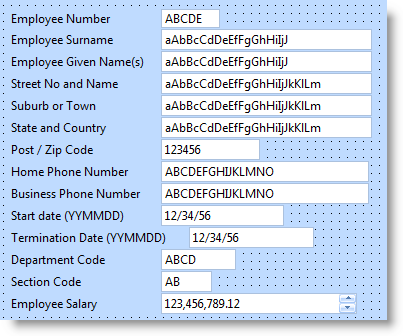
Employee Details Fields
You will need these fields showing employee details on the form:
|
|
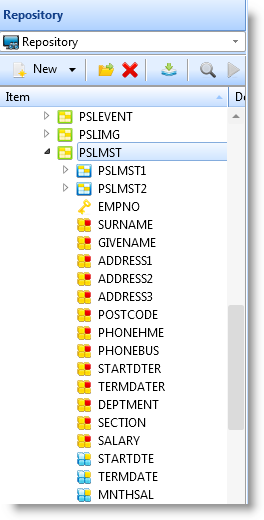
To add the fields, again display the PSLMST file in the Repository tab. Drag and drop these fields to the form:
Notice that as you drag the fields to the form, they are displayed with a label specified in the field definition. Also, they are filled with sample data which indicates the required length for the field. |
Status Bar
Lastly, you need a status bar for showing messages:

Display the the Controls tab and drag a status bar to the form. It will automatically attach itself to the bottom of the form.
Finalize the Interface
Make sure that the interface of the application corresponds to the picture shown in Create an Application at the beginning of these steps.
Now that your user interface is complete, it is time to write the code. Click on the Source tab to display the source code for the form. You will notice that the editor has automatically created the DEFINE_COM statements for the controls and fields you have included on the form. These statements show the properties defined for the components.
3a. Create a Group for All the Employee Details Fields
To make it easier to deal with all the employee details fields, create a group for them:
GROUP_BY NAME(#ALLFLDS) FIELDS(#EMPNO #SURNAME #GIVENAME #ADDRESS1 #ADDRESS2 #ADDRESS3 #POSTCODE #PHONEHME #PHONEBUS #STARTDTE #TERMDATE #DEPTMENT #SECTION #SALARY #MNTHSAL)
3b. Write an Event Routine for the Get Button
1. To write the code to fill the list view according to a partial surname, display the Details tab, select the GET button on the list and then bring the event tab to the front.
2. Double-click on the Click event. Notice that editor inserts the EVTROUTINE and ENDROUTINE statements for you in the Source view.

The icon in front of the Click event in the Details tab changes to indicate that a routine has been specified for the event:
3. Add the following code in the Click event of the Get button:
EVTROUTINE HANDLING(#GET.Click)
change #surname #partname
clr_list #ltvW_1
SELECT FIELDS(#ltvw_1) FROM_FILE(PSLMST2) WITH_KEY(#SURNAME) GENERIC(*YES)
add_entry #ltvw_1
endselect
ENDROUTINE
The event routine assigns the value entered in the #PARTNAME field to #SURNAME. It then clears the list view. The SELECT loop selects all employees whose surname matches the value of #SURNAME and adds the entries to the list view.
4. Write an Event Routine to Fetch the Details for an Employee:
a. Create a Click event routine for the ItemGotSelection event of the list view. This event is triggered when the user selects an employee in the list view.
b. Now write the following code to fetch the details for the selected employee.
EVTROUTINE HANDLING(#LTVW_1.ItemGotSelection)
FETCH FIELDS(#ALLFLDS) FROM_FILE(PSLMST) WITH_KEY(#EMPNO) ISSUE_MSG(*YES)
ENDROUTINE
5. Write an Event Routine to Enter a New Employee
Create an event routine for the Click event of the New button. Use the event to blank out all the fields so that the details of a new employee can be entered.
EVTROUTINE HANDLING(#NEW.Click)
change #allflds *Null
ENDROUTINE
6. Write the Event Routine to Delete an Employee
Create an event routine for the Click event of the Delete button to delete the currently selected employee:
EVTROUTINE HANDLING(#DELETE.CLICK)
DELETE FROM_FILE(PSLMST) WITH_KEY(#EMPNO) ISSUE_MSG(*YES)
ENDROUTINE
7. Write the Event Routine to Save Changes
Create an event routine for the Click event of the Save button to either update the details of an existing employee or to insert the details of a new employee:
EVTROUTINE HANDLING(#SAVE.CLICK)
check_for in_file(pslmst) with_key(#empno) val_error(*next)
if_status is(*EQUALKEY)
UPDATE FIELDS(#ALLFLDS) IN_FILE(PSLMST) WITH_KEY(#EMPNO) ISSUE_MSG(*YES)
IF_STATUS IS(*OKAY)
MESSAGE MSGTXT('Employee details have been updated.')
endif
else
INSERT FIELDS(#ALLFLDS) TO_FILE(PSLMST) ISSUE_MSG(*YES)
IF_STATUS IS(*OKAY)
MESSAGE MSGTXT('Employee details have been added.')
endif
endif
ENDROUTINE
The event routine first checks to see if the employee exists. If it does, it updates the employee details. If no record with the matching employee number is found, it inserts the employee details. A message is displayed after the update and the insert.
Step 4. Compile and run the Program
The application is now complete.
1. To compile the program, select the Compile command on the ribbon.
You do not need to keep the generated source or debug enable your component. In the Component Compile Options dialog box specify the options like this:

2. Click OK.
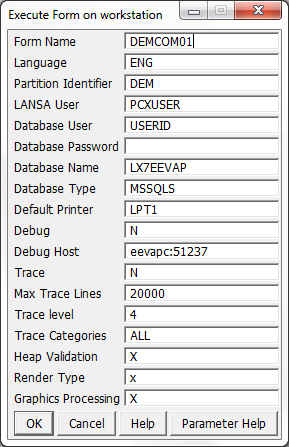
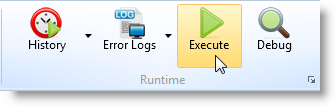
3. After the compilation has ended, execute your program using the Execute command:
Note that you can also execute the form outside the LANSA development environment. From your LANSA System's desktop folder, select Execute Applications and then Exec Form: