7.109.6 SELECT_SQL Statement Wizard
This feature is available with EPC 150010.
Use the SELECT_SQL Statement Wizard to easily create SELECT_SQL statements in RDMLX-enabled components. It can be used anywhere that you would use a SELECT_SQL using statement.
The statements can search over a table, or a value in multiple columns (fields).
The Wizard allows you to select from all the database types supported by LANSA.
It can be used on both Visual LANSA independent systems as well as Visual LANSA slave systems linked to an IBM i.
Related files will be available for inclusion. They will not be automatically included.
You can choose files that are known to be related to a selected file by LANSA. In addition, files can be nominated manually and the relationship specified.
Note: If you wish to enlarge any graphics, refer to Enlarging Graphics in the Documentation Tips.
To use the Wizard
To start the wizard, open a component, display the Source tab and type SQL on a blank line, then press Enter.
The Wizard will open displaying the Start tab:
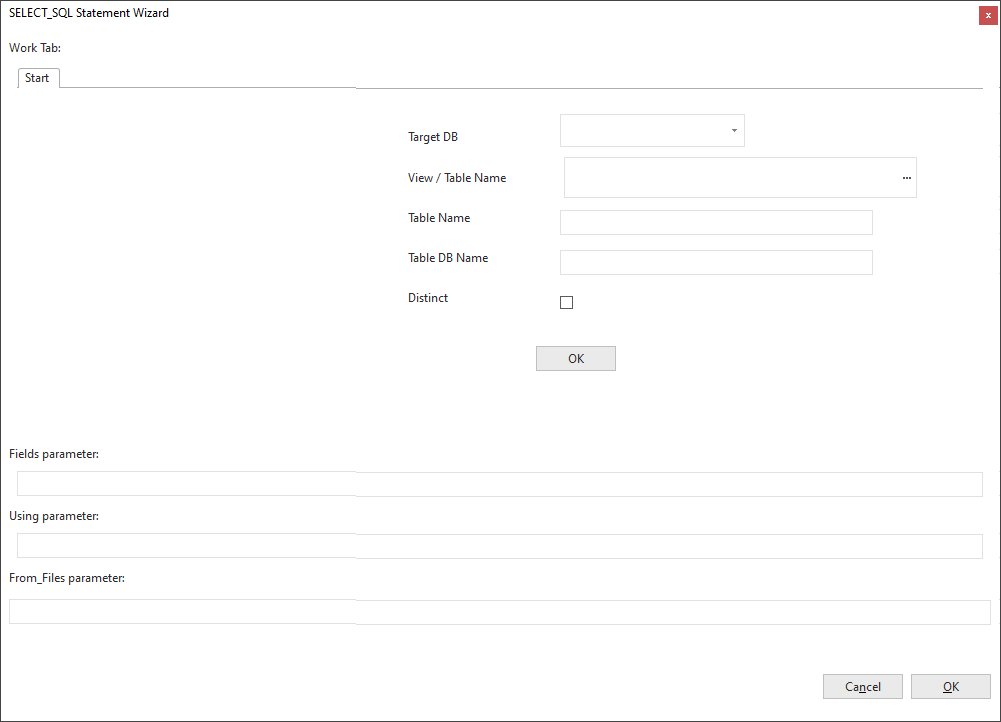
You will use this window to define your requirements. At the bottom of the dialog is the RDMLX code being developed by your choices in the top half of the dialog.
To enlarge this screen picture refer to Enlarging Graphics.
At this stage, only the Target DB and the Cancel are enabled.
Click on the Target DB dropdown:
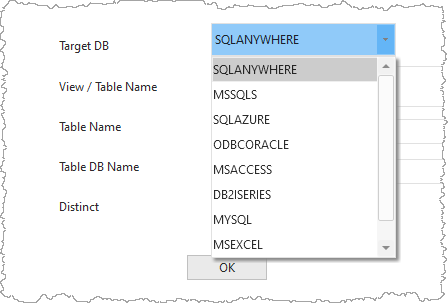
Every Target database product that is enabled for the partition is listed.
For example, select DB2ISERIES as the target database you are going to use.
The View/Table Name & Distinct are enabled.
Click on the View/Table Name ellipsis and choose a table. It may or may not be related within LANSA to other tables.
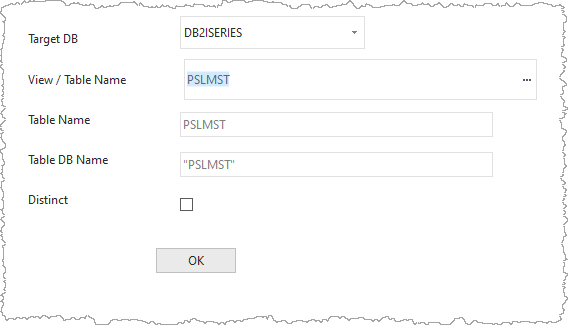
When you have chosen a View/Table Name, the Table Name and Table DB Name will contain values.
The Table Name will be the table name as known to LANSA. The Table DB Name will the table name as known to the target database
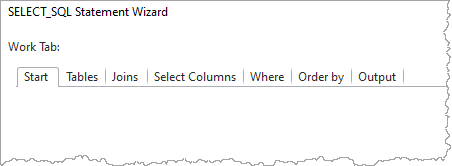
If correct, click on the upper OK button.
The Tables, Joins, Select Columns, Where, Order by and Output tabs will now be displayed:
At the bottom of the dialog:
The Fields parameter will show a list of non-LOB fields for the file with the names known to LANSA, with the local hash character as the field prefix.

The Using parameter will show the SELECT statement for all the non-LOB fields in the file:
Within the SELECT statement, the From clause will show the table's DB Name, but there will be no Where or Order by clauses yet.
The From_File parameter will show the name of the file as LANSA knows it:

Tables tab
Click on the Tables tab:

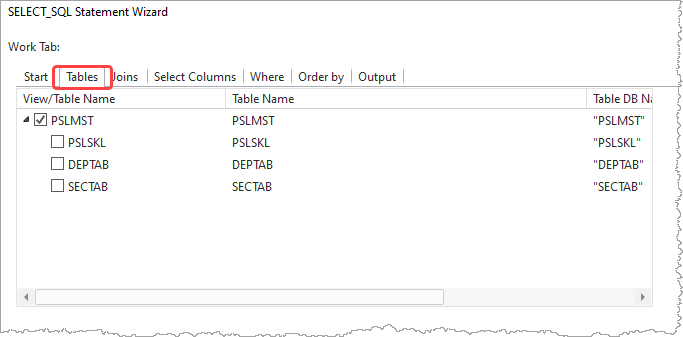
The tree will show the selected file as ticked, along with those files directly related to that file by validation rules or access routes.
Select one of the related files:
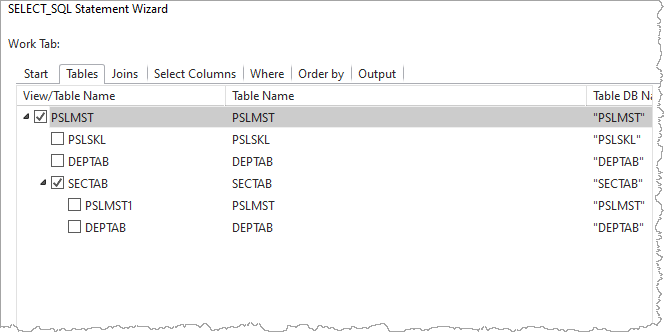
The selected file will now have a tick against it, and any files directly related to it listed below it.
The Fields parameter is updated to also show the list of non-LOB fields for the file as LANSA knows the names.
The Using parameter will be updated to show the SELECT statement for all the non-LOB fields in the file; the FROM clause of the SELECT in the Using parameter to show the DB Name; ON added with the DB column names for the LANSA field names that form the relationship, but no Where or Order by clauses.
The From_File parameter will now include the name of the file as LANSA knows it.

Joins tab
Click on the Joins tab:
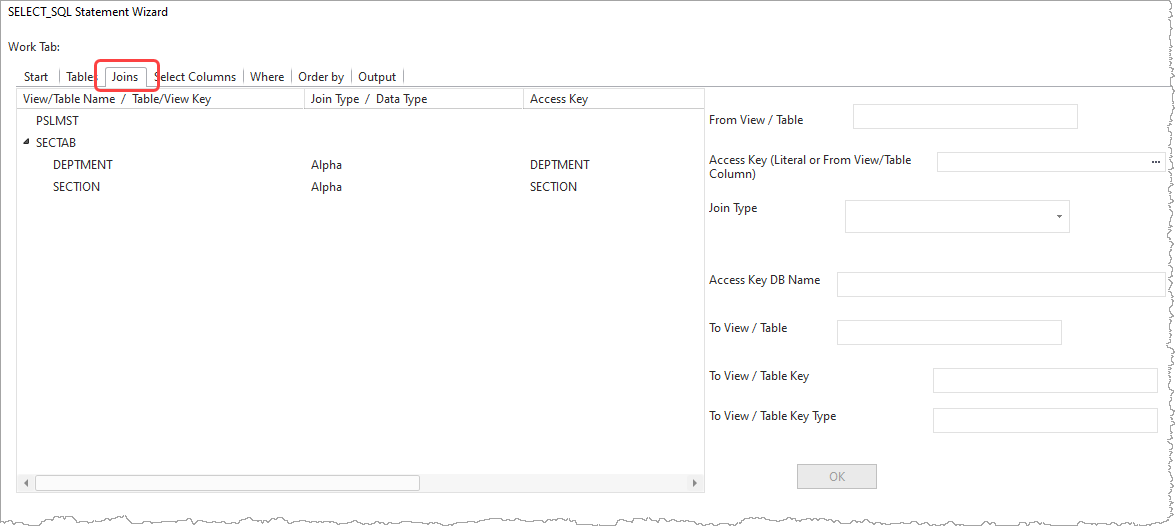
The selected tables will be shown in the left most column. After each table (except the first) the detail of the join relation to that file is shown, if there is a relationship known to LANSA. Otherwise the join keys need to be defined here.
Select Columns tab
Click on the Select Columns tab:
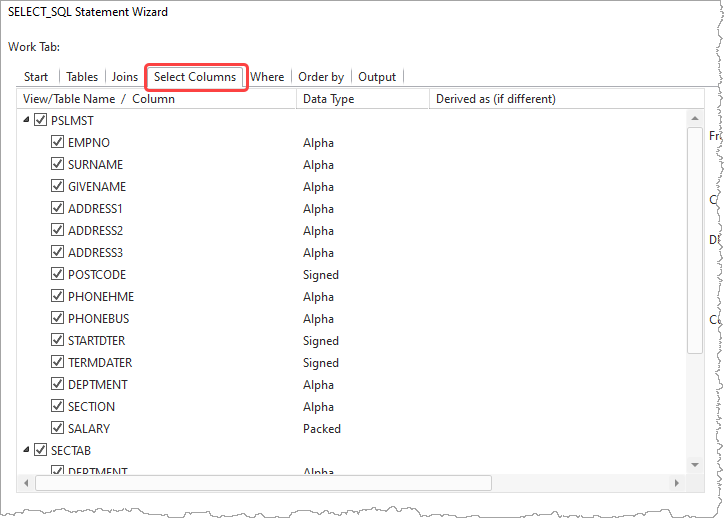
All columns in all the tables selected will be displayed.
They will all, initially, be shown as selected.
Uncheck any columns that are not required.
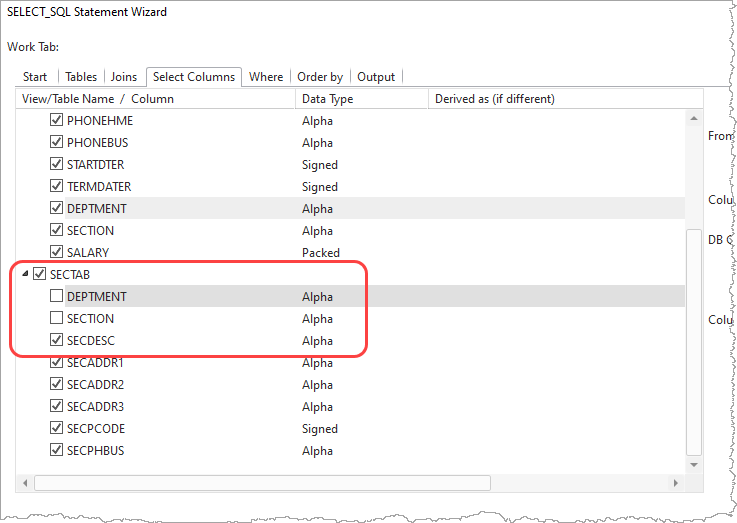
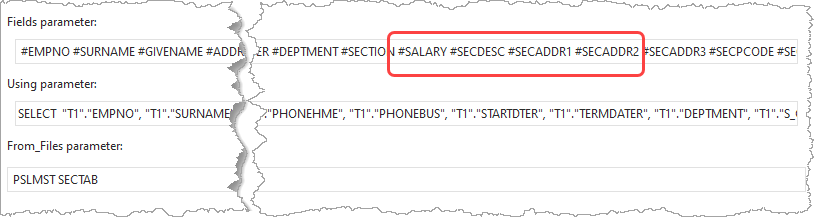
The Fields and Using parameters will have the relevant fields removed:
Where tab
Click on the Where tab:
All columns in all the tables selected will be shown as available for use in the WHERE clause.
Expand the relevant table name and right click a row to use .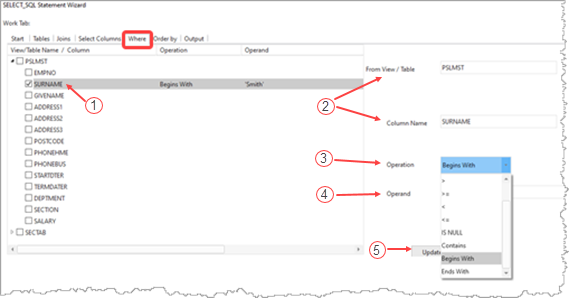
The From View/Table Name/Column is displayed . Click on the Operation drop down and choose an operation, then tab to the Operand and type it in.
Press the Update button .
The tree view now shows the Operation and Operand. The Using parameter will now show the addition to the Where clause.
Order by tab
Click on the Order by tab
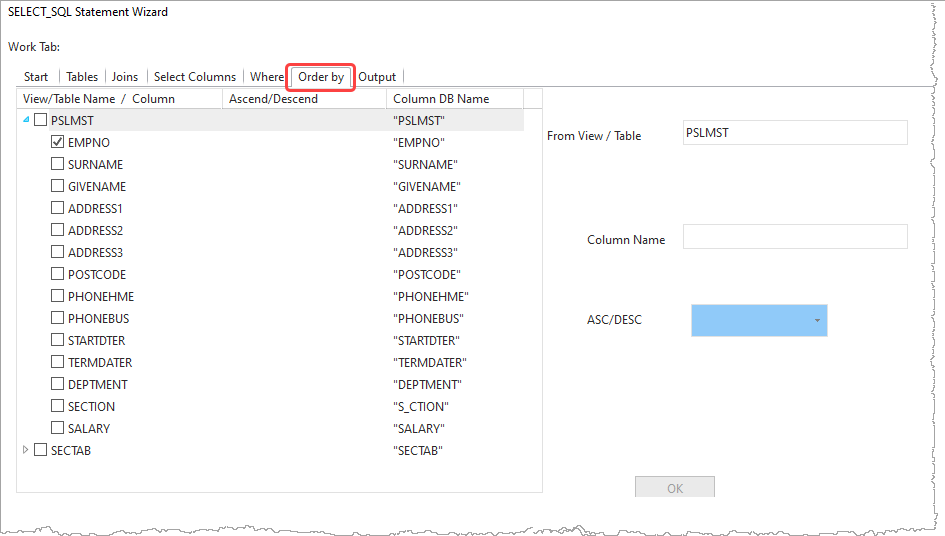
You may have to expand the tables to show the columns.
All columns in all the tables selected will be shown as available for use in the Order by clause.
By default, the primary keys of the tables selected will be in the Order by clause.
Make the Order by what you want it to be by unselecting existing selection and selecting the order that you want.
The Using parameter will be updated with the order you have selected.
Output tab
Click on the Output tab.
This can be done at any time that it is visible. It will show the current SELECT_SQL statement.
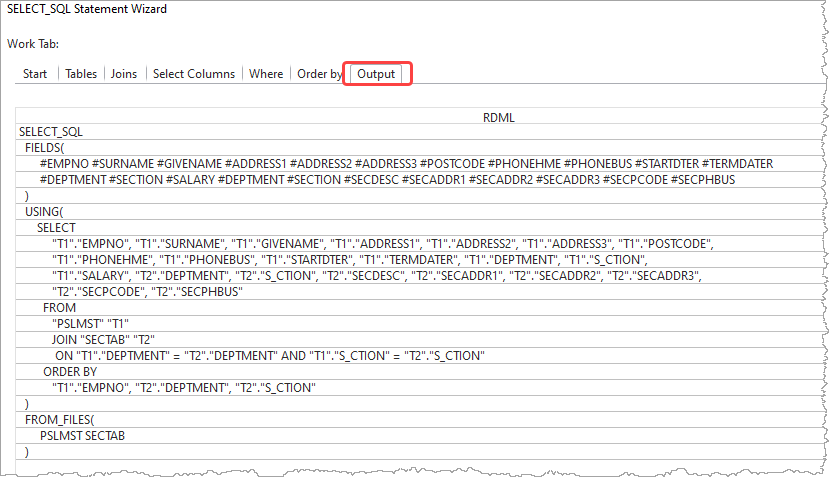
This tab shows you the formatted version of the SELECT_SQL RDML containing your choices.
Click on the bottom OK button to generate the code.
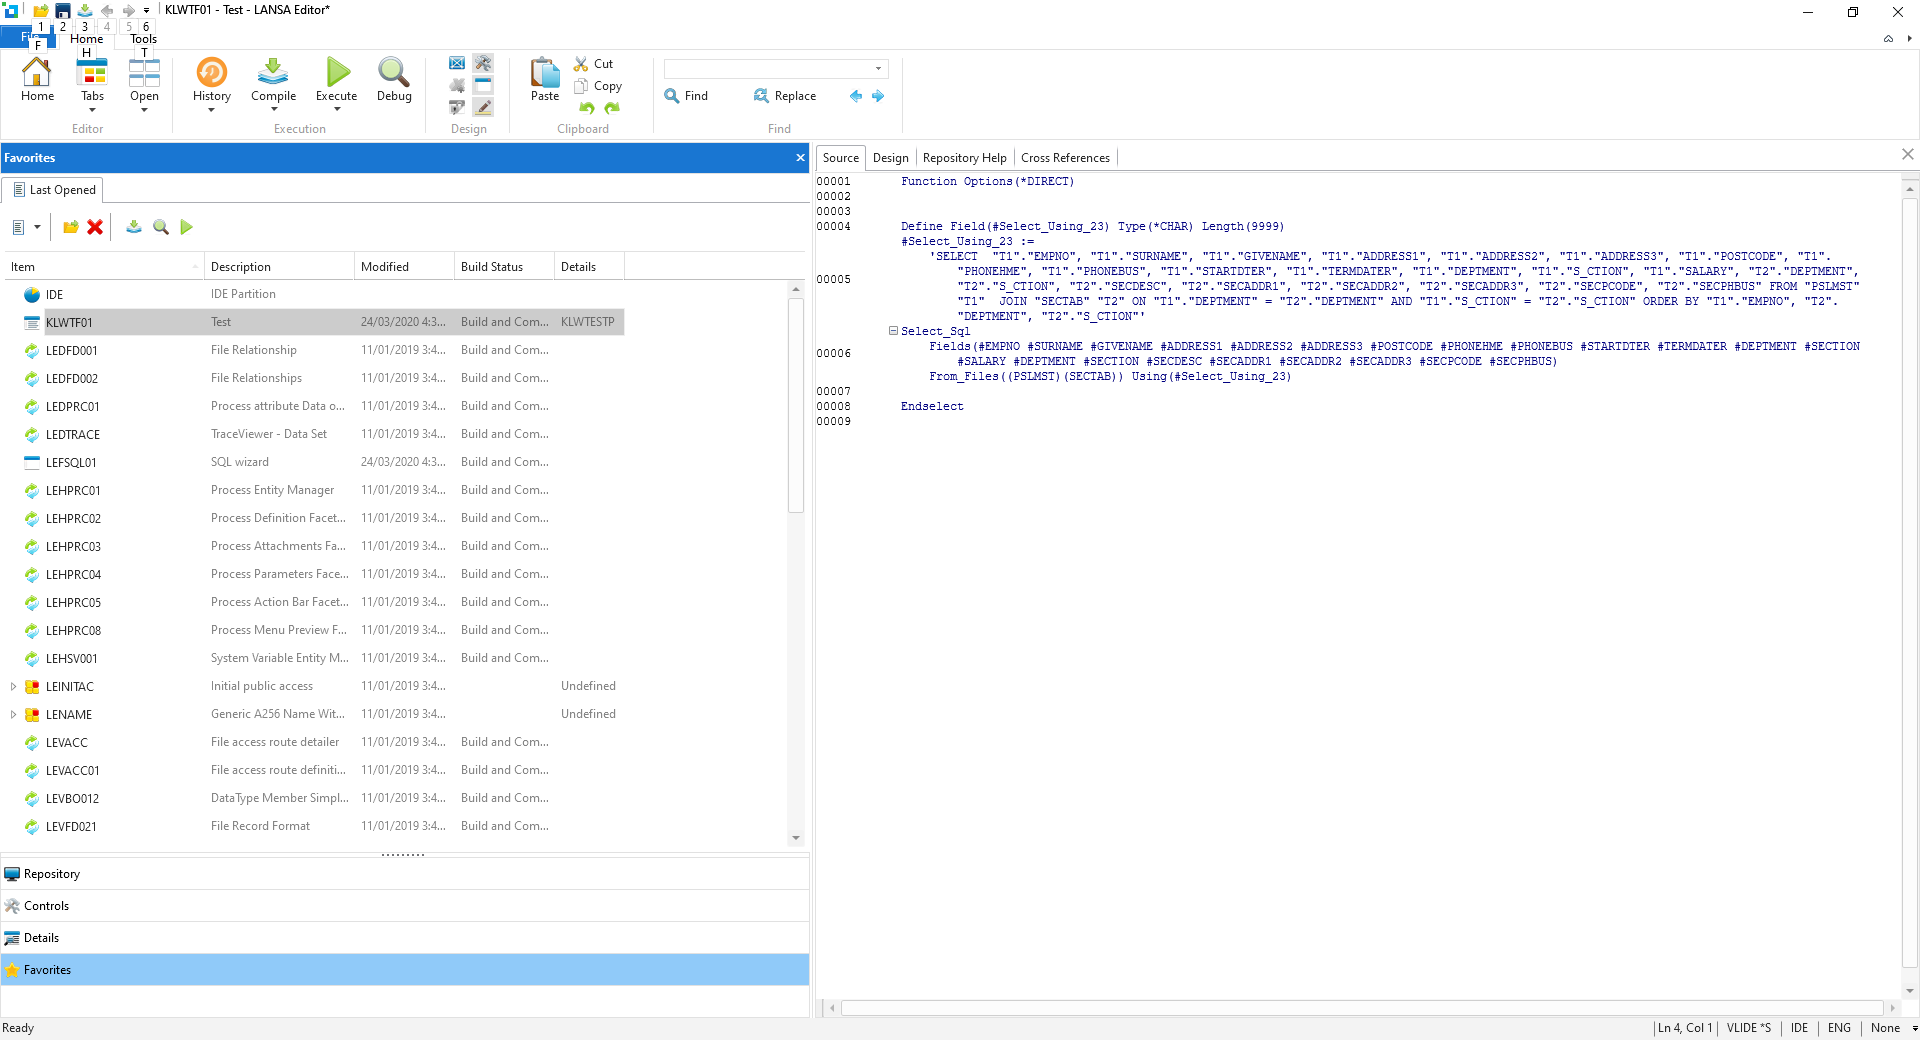
Due to language limitations, the actual code generated will have the USING parameter in a separate generated field.
The Wizard has now completed your code.