FRM025 - Insert a Database Record
1. Select the Repository tab. Expand the Files group. If necessary change the Files group to Alphabetic Grouping by using the right mouse menu on the Files group.
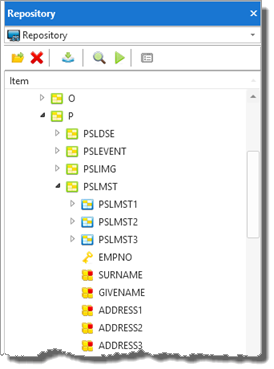
2. Expand the P group and expand the file PSLMST. Your Repository tab should look like the following:
3. Enlarge the Width and Height of the form by dragging the handle on its edge.
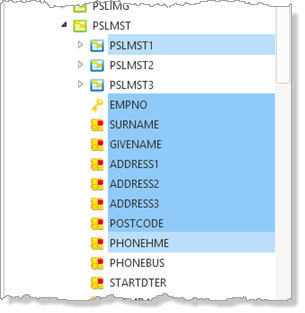
4. On the Repository tab, hold down the Shift key and use the left mouse button to select EMPNO and then PHONEBUS. All fields between these will be selected. This is a standard Windows select a group of objects technique.
5. Drag these fields onto the first row and first column.
6. Select the group of fields from DEPTMENT to STARTDTE and drag these onto the form just below the other fields.
Note: STARTDTE is a virtual field which updates the real field STARTDTER.
Adjust the form if necessary so that all the fields fit into the first row and column.
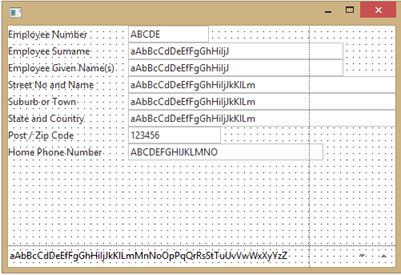
7. Select fields to adjust their widths as necessary. The sample data shown on the Design tab, represents the field's actual length.
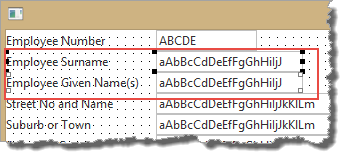
Note: You can select multiple fields (Shift+Left Mouse) and adjust their width together.
8. Select the first field (Employee Number) and use the Layout ribbon to change its margin Top to 10 and margin Left to 10.
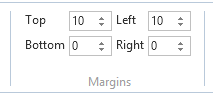
These step leaves space on the form to select all the fields by dragging the mouse.
9. Position the mouse above and to the left of Employee Number. Holding down the left mouse button drag down to below the last field and to the right hand side, and release the mouse. All the fields will be selected.
Now repeat 8. To give all fields a margin Top of 10 and a margin Left of 10.
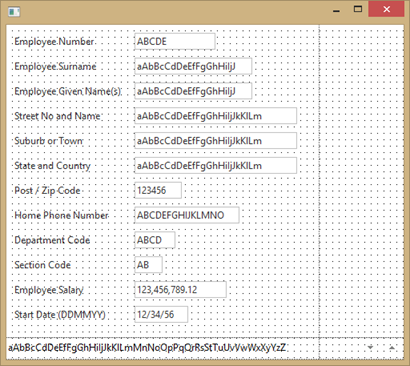
Your form should look like the following:
10. Save your form.